These DIY outdoor kitchen ideas run from a $30 stack of cinder blocks to a wooden bar island you can build in a weekend, and the right one depends on whether you want a grill station, a smoker setup, or a full pizza oven with concrete countertops and a pergola overhead.
A working setup can start at $200–500 if you pour your own concrete countertop and build a cinder block frame yourself, though most people add the smoker, the bar island, and the pergola in later years as separate projects.
[link-whisper-related-posts]1. Grill Island
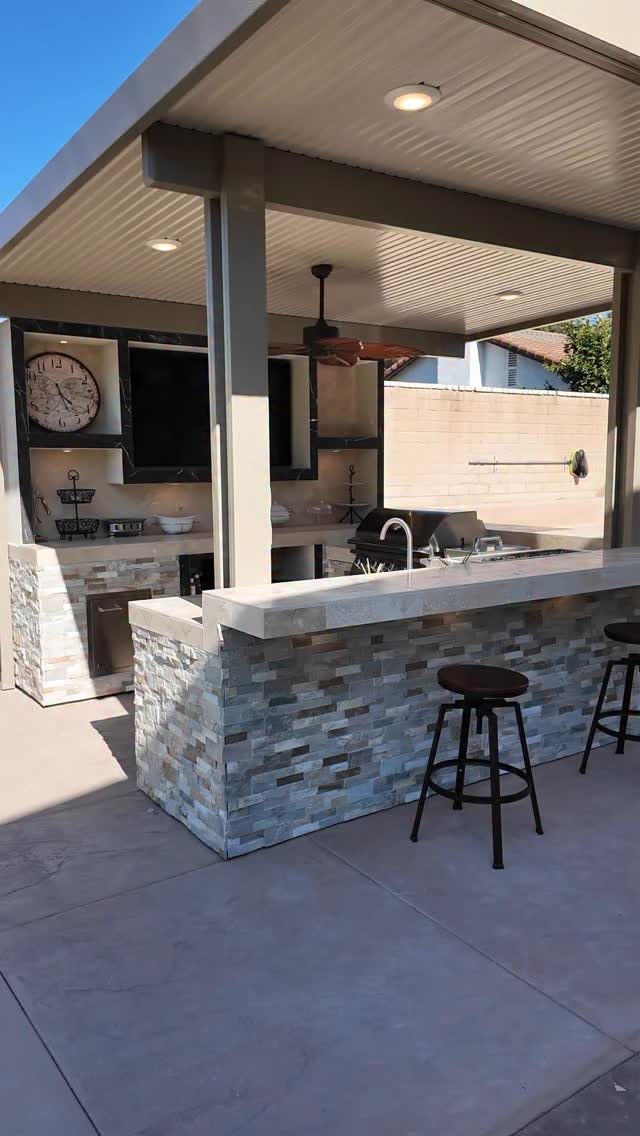
A grill island turns the cook from a solo operator into part of the party.
Wood, metal, brick, or cinder block frames each carry a different price and a different look; pick the one that matches what you already have outside.
I would build the frame around a gas insert first, since that leaves budget for counter space and a sink if you want one.
Layout matters more than looks: an L-shape fits a corner, linear runs along a wall, and a U-shape only works if you have the width.
Leave removable panels anywhere the grill needs maintenance access; every manufacturer specs different clearances, and you will need them later.

【Durable Tabletop】 This outdoor grill cart features a premium stainless steel tabletop. That is sturdy and durable with excellent load-bearing capacity.The stainless steel tabletop is not only heat-resistant and deformation-proof, but also easy to clean, maintaining its attractive appearance over time

⭐【Durable Premium Material】Crafted with food-grade 304 stainless steel countertop and weatherproof resin body, this grill cart effectively fights rust, corrosion and damage from harsh sun, rain and humidity, delivering solid long-lasting performance whether placed inside your house or on outdoor patios and backyards.

Premium Stainless Steel Tabletop:Crafted with durable stainless steel, this heat-resistant and easy-to-clean tabletop is ideal for prepping ingredients, placing hot grill tools, and serving BBQ. It resists rust, stains, and scratches, ensuring long-lasting performance even in harsh outdoor weather. With a generous size and flat surface, it provides ample workspace for multi-person BBQ prep and daily use in your outdoor kitchen island and backyard.
2. Outdoor Kitchen Smokers
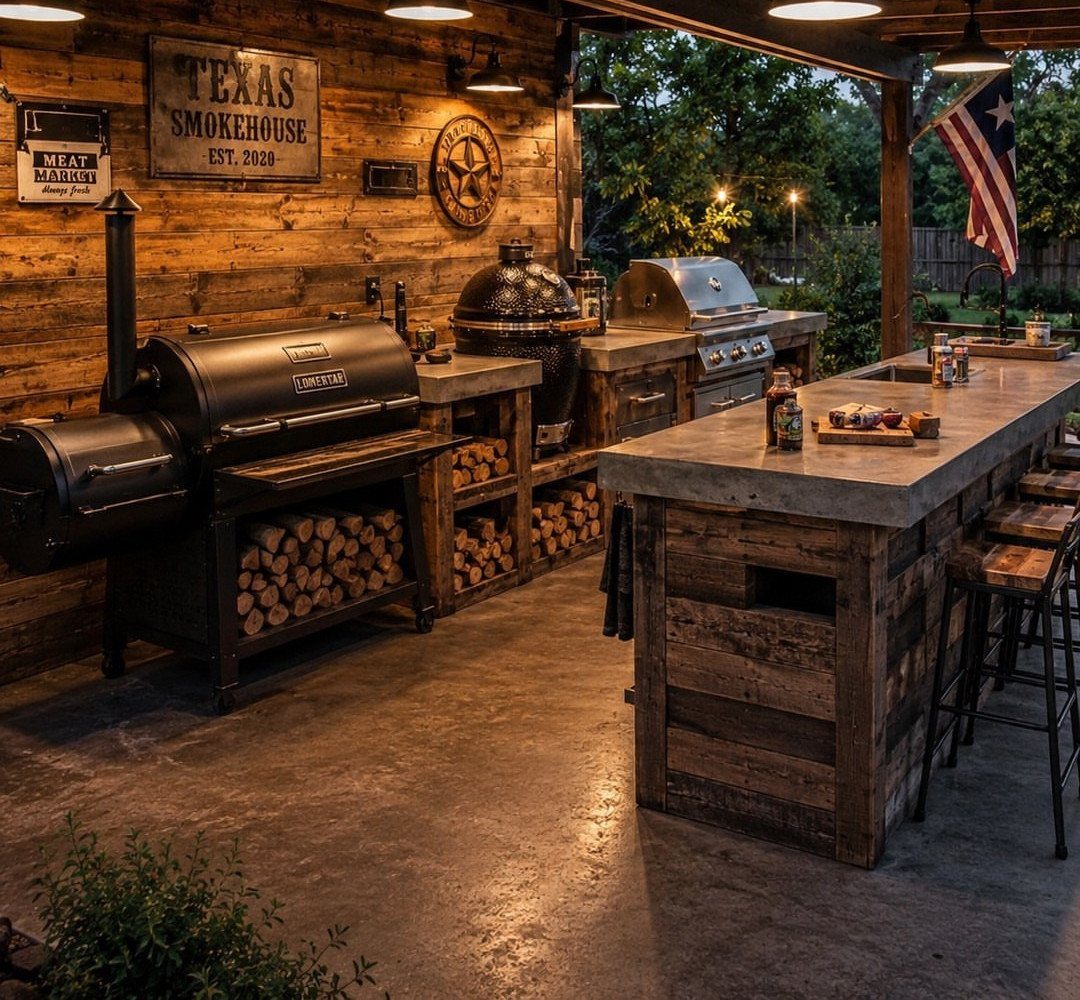
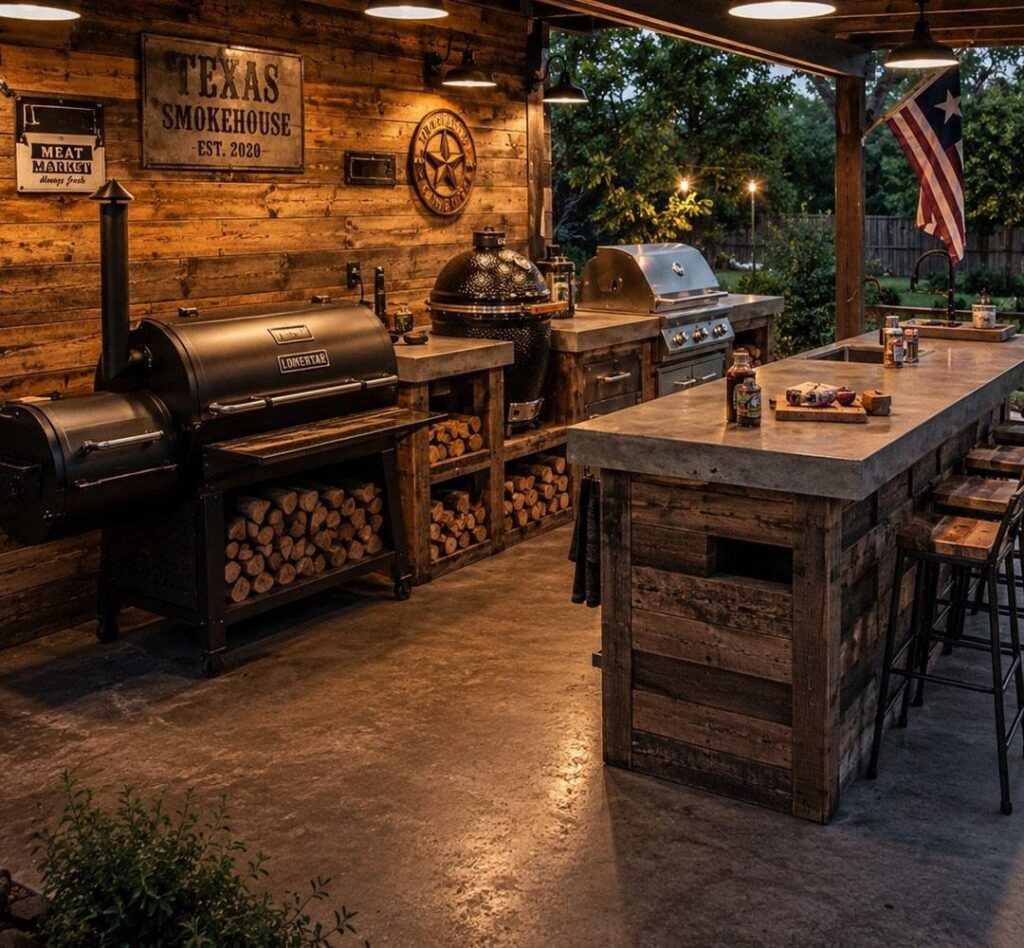
Smokers, griddles, and outdoor TVs turn a basic grill station into something closer to a full outdoor room.
Running offset, kamado, and gas side by side is how you end up when one person in the house will not give up charcoal and the other will not wait for it.
A kamado or offset smoker does not need to be built in; it needs a level surface and enough clearance from anything that burns.
Built-in gas was the only option in one kit I looked at, and the missing charcoal slot was the gap that stayed obvious after everything else went in.
If you cook low and slow even twice a summer, plan the space for it now.

Premium Stainless Steel Frame For Durability: Designed with a rust-resistant stainless steel frame, this outdoor grill combines exceptional durability with a stylish, modern design. The easy-to-clean surface makes maintenance a breeze

The entire built in gas grill is made of 304 stainless steel, with a main body thickness of over 2mm. The elaborately polished corners exude an air of high-end quality.

3. Pizza Oven
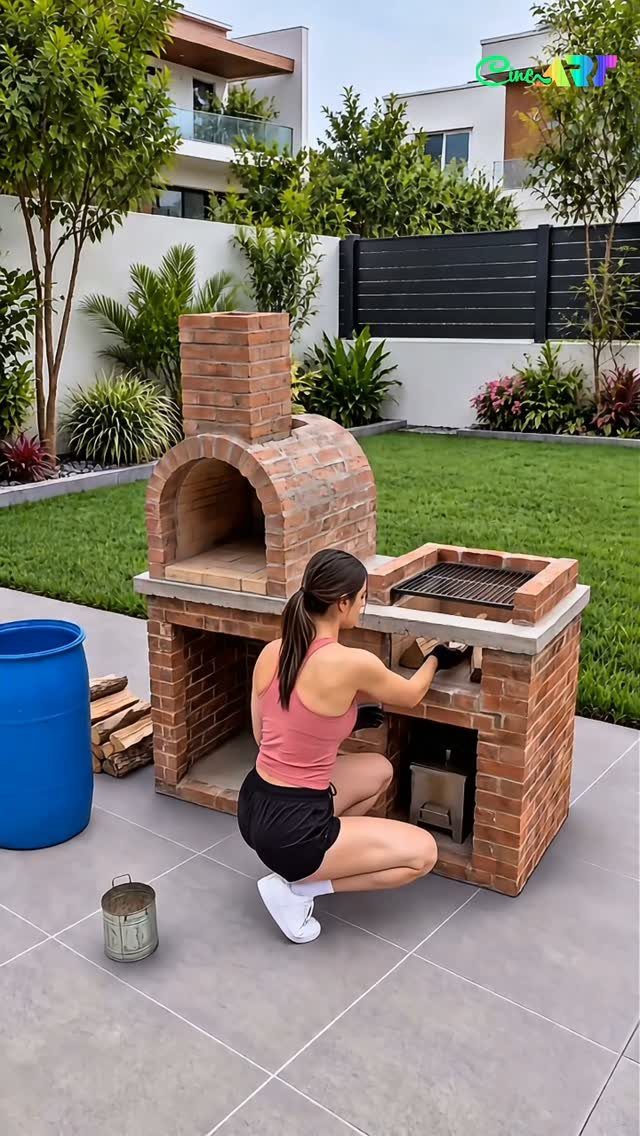
A pizza oven buys you something no grill does: a reason for everyone to stand around and build their own dinner.
Countertop wood-fired models from Ooni or similar run $350–600 and sit right on the existing counter; a basic cob or brick oven you build yourself lands closer to $200–500 if you have the weekend.
For tighter spaces, the portable route keeps the same function without the permanent footprint. Either way, the dough work happens outside, the oven does the theater, and the host is not stuck at the indoor stove while guests wander.

MAKE ANYTHING AND EVERYTHING: This all-in-one electric pizza oven is perfect for easy countertop cooking. It’s not just an indoor pizza oven; with one appliance, you get an omelette maker, pancake griddle, sandwich maker, tortilla press, and crepe maker!

5-IN-1 FUNCTIONALITY: The ultimate outdoor sidekick for all your backyard entertainment; pizza, bake, broil, warm & proof.

【Premium & Safe Stainless Steel】Outdoor pizza oven is constructed with high-quality stainless steel. High temperature resistant coated stainless steel shell offers optimal heat retention. This sturdy and compact oven is safe for cooking all types of foods
4. Concrete Countertops
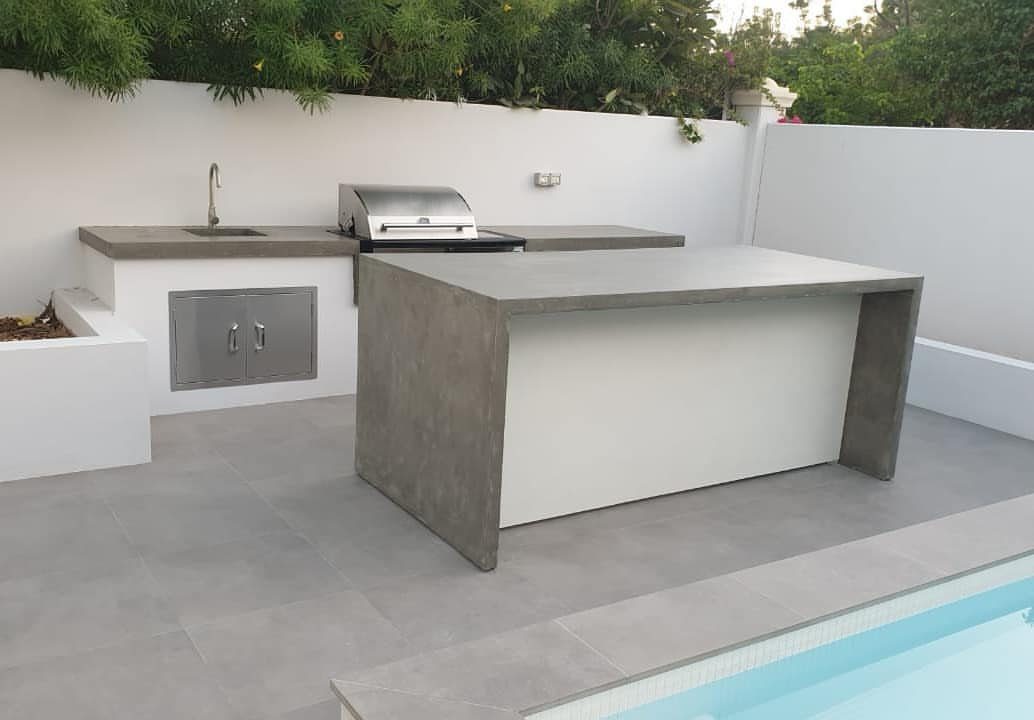
Concrete countertops survive weather that would warp wood and cost less than stone that someone else finished.
Pour your own from countertop mix in a melamine form: four to six bags covers about 3 by 6 feet, and the whole pour runs $30–80 including sealer and the form lumber.
Trowel smooth, cure three to five days, then seal with something food-safe.
If you want the look without the pour, countertop fabricators sell remnant granite slabs for $50–150; already sealed, already polished, but you need one that fits your base without cutting.

【Multi-functional Outdoor Pizza Oven】 Our outdoor oven is much more than a pizza oven, as well as roasting meat, steaks, fish, bread and vegetable dishes and so much more. With the 12" pizza stone, you’ll get that perfect crispy crust on the bottom and around the edges of the pizza.

5. Open Shelves Below the Counter
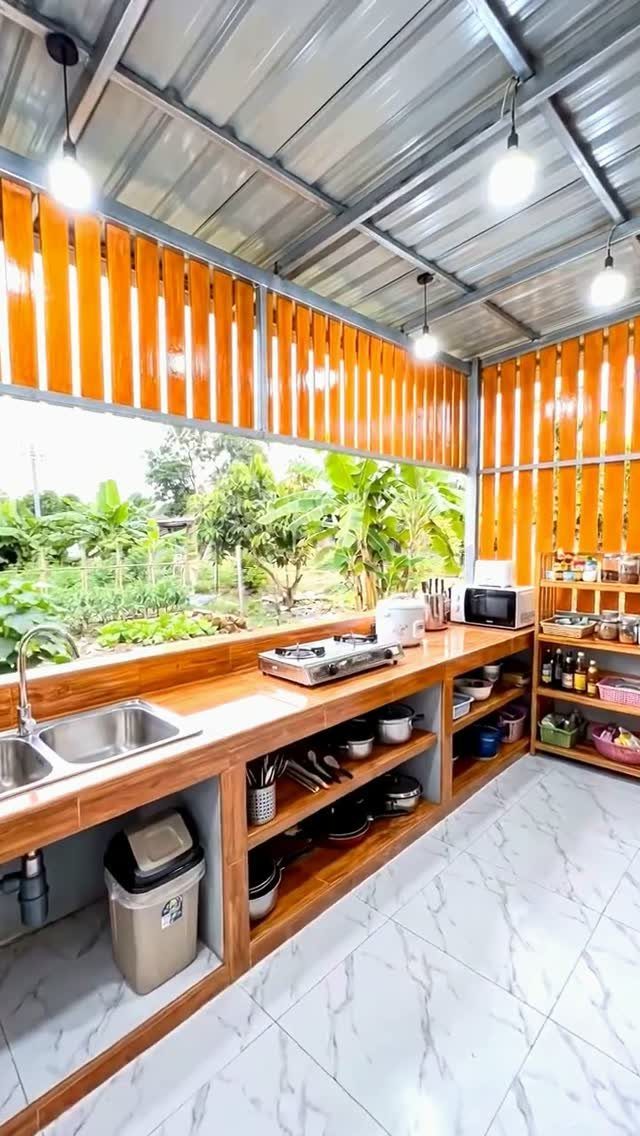
Open shelves below the counter keep plates, bowls, and tools where you use them, no drawer hardware to fail in humidity.
Pressure-treated lumber matches the frame and takes the same finish; old kitchen cabinets work too if you seal them with exterior paint or polyurethane first.
Before you build, decide what actually belongs outside: cast iron that you reseason, melamine that does not mind rain, nothing that rusts quietly in a cabinet you never open.
6. Pergola or Canopy
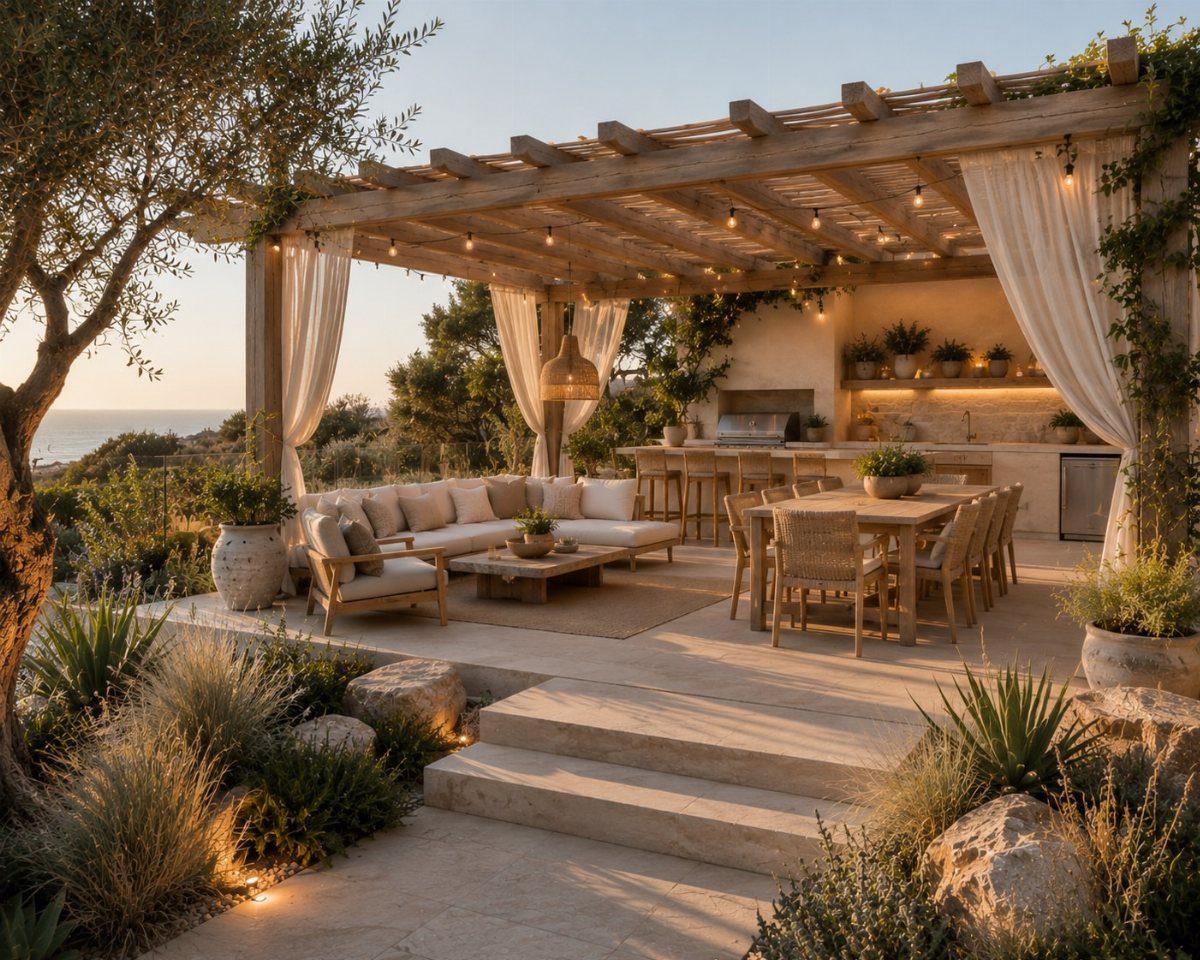
A pergola or canopy stretches the cooking season past perfect days into the ones that would otherwise send you inside.
Canopies run from a few hundred to several thousand depending on size and whether they enclose; pergolas you can build or buy, permanent in exchange for the labor.
I would decide first whether the goal is shade, rain cover, or the feeling of a defined space, since each answer points to a different structure and a different budget.
7. Wooden Bar Island
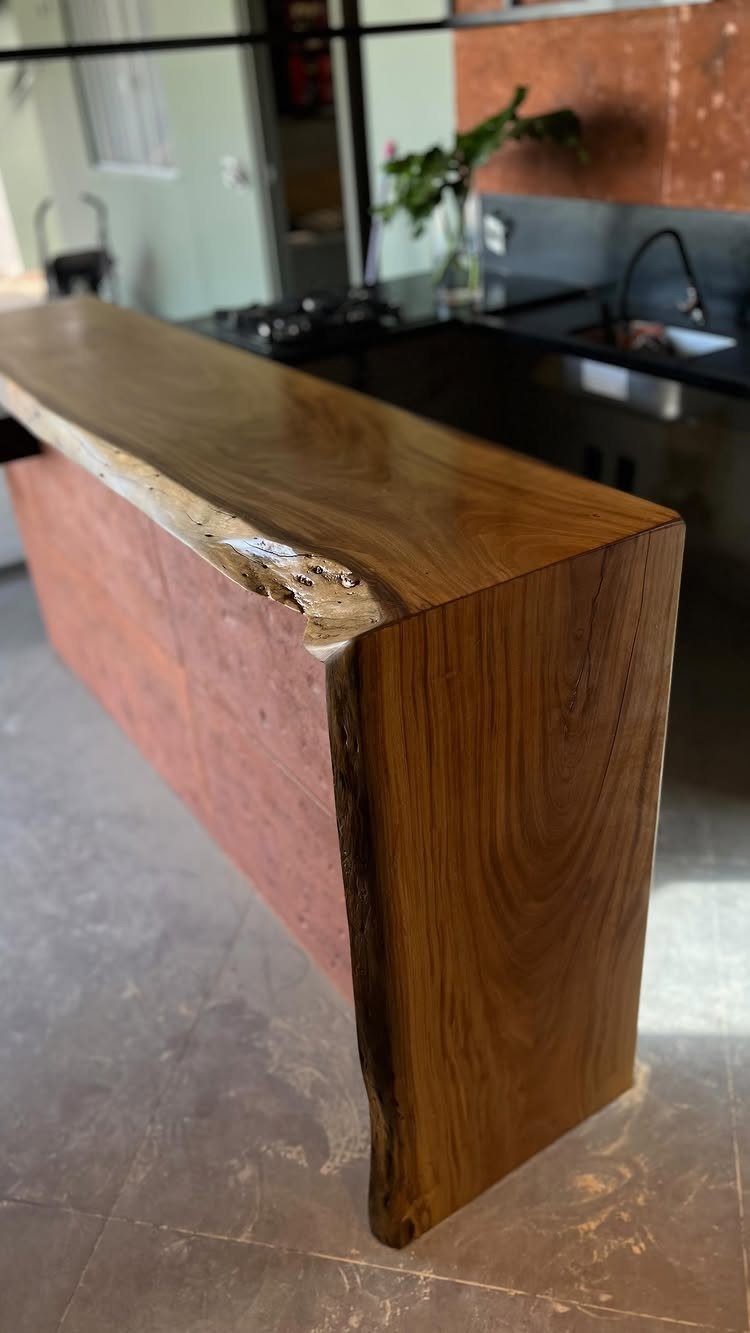
A wooden bar island gives guests somewhere to lean with a drink while you finish the steaks.
A live-edge slab on top is what people notice first; the base underneath can be simple 4×4 posts or the same cabinet box you built for the main counter.
Bar-height stools will sit too high at a standard counter, so check what height you are building before you buy them.
A pergola overhead turns afternoon sun into dappled shade; string lights across the rafters and you have the evening hours too. I would build storage into the back side first, since the front is all for looks and leg room.
8. Cinder Block Base
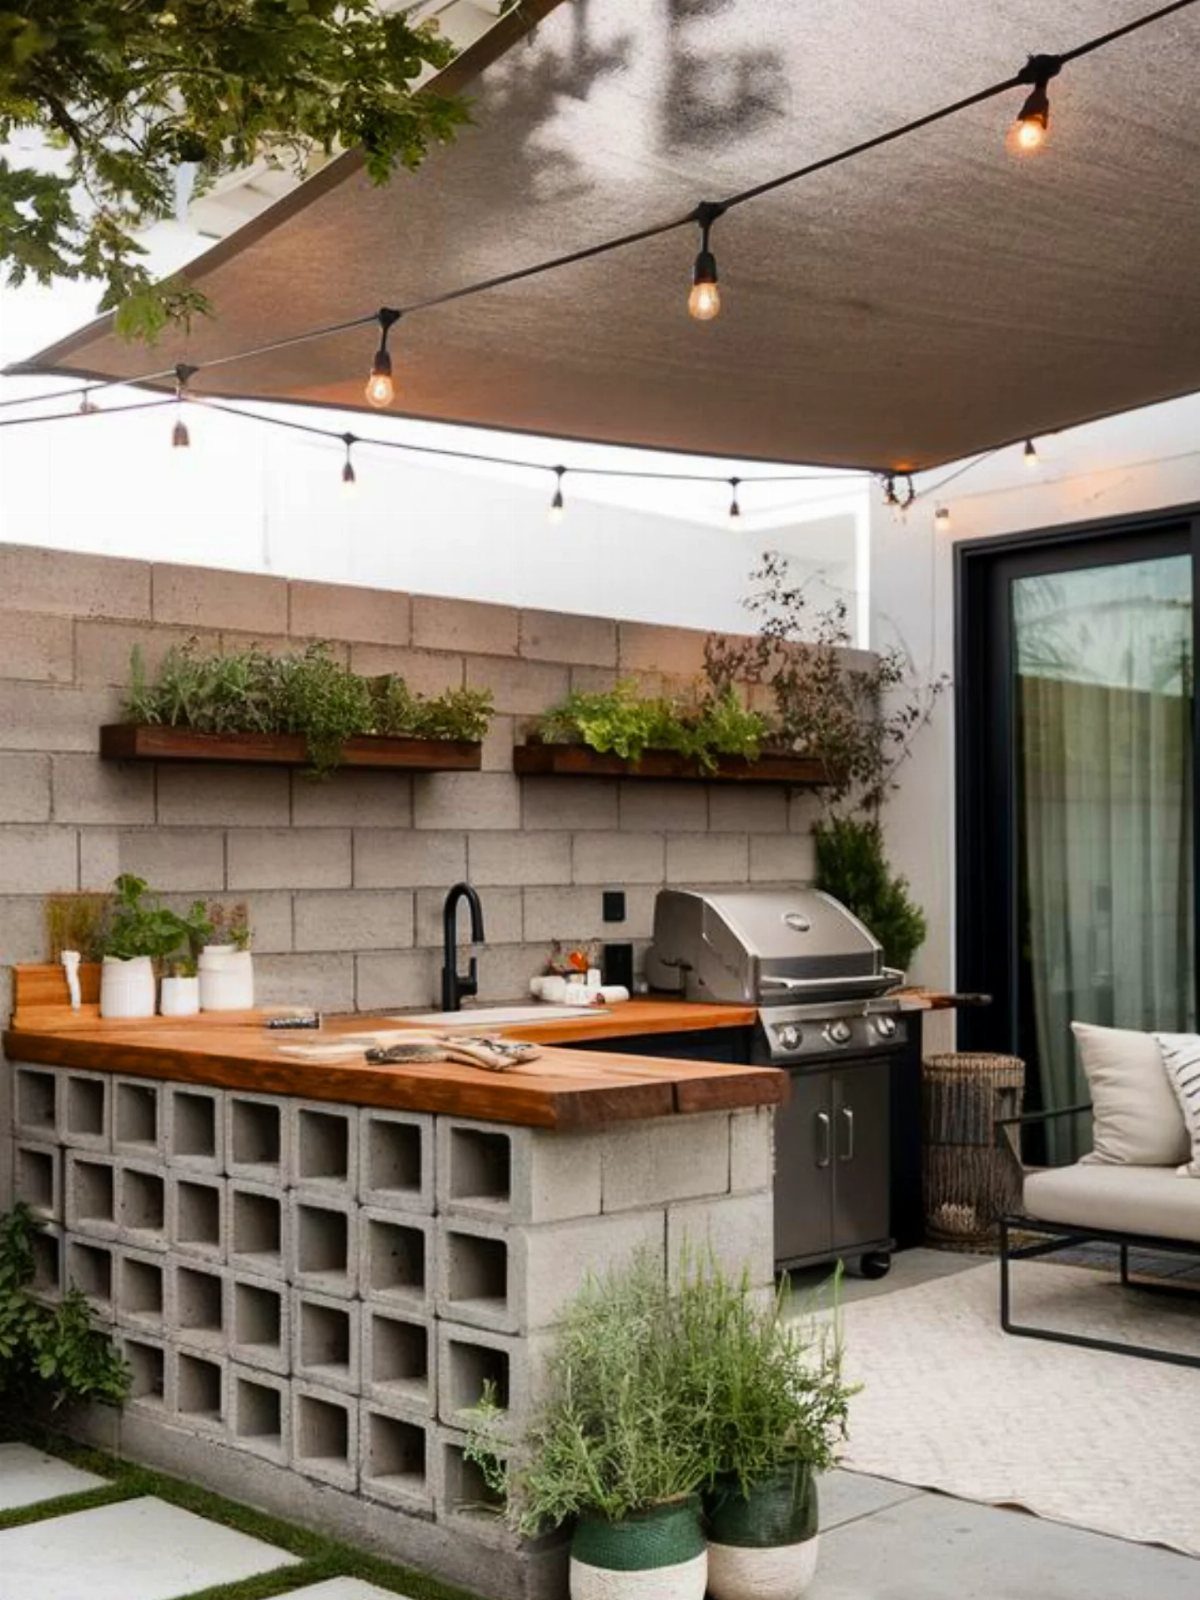
Cinder block bases are the outdoor kitchen you can stack on Saturday and cook on Sunday. Standard 8x8x16 blocks run $1–2 each; a two-column frame 4–6 feet apart takes 30–40 blocks, so $30–80 and no mortar.
Cinder blocks stack to counter height with the open cores facing out, which leaves room for storage bins or a propane tank in the middle.
Keep any LP cylinder upright, outdoors, and ventilated: the gas pools low, so an enclosed cabinet needs openings at the bottom and five feet of clearance from flames or outlets.
A wood countertop across the top finishes it; the weight holds everything in place.

5-IN-1 FUNCTIONALITY: The ultimate outdoor sidekick for all your backyard entertainment; pizza, bake, broil, warm & proof.

5-IN-1 FUNCTIONALITY: The ultimate outdoor sidekick for all your backyard entertainment; pizza, bake, broil, warm & proof.

[Homemade Pizza Bliss]:Experience the pure delight of crafting 12" pizzas tailored to your taste! This versatile Countertop Pizza Maker transforms dough into golden perfection while doubling as a sandwich press, tortilla warmer, crepe maker, omelet station, quesadilla grill, and beyond. One appliance, endless culinary adventures!
9. Outdoor Kitchen Surrounded with Plants and Flowers
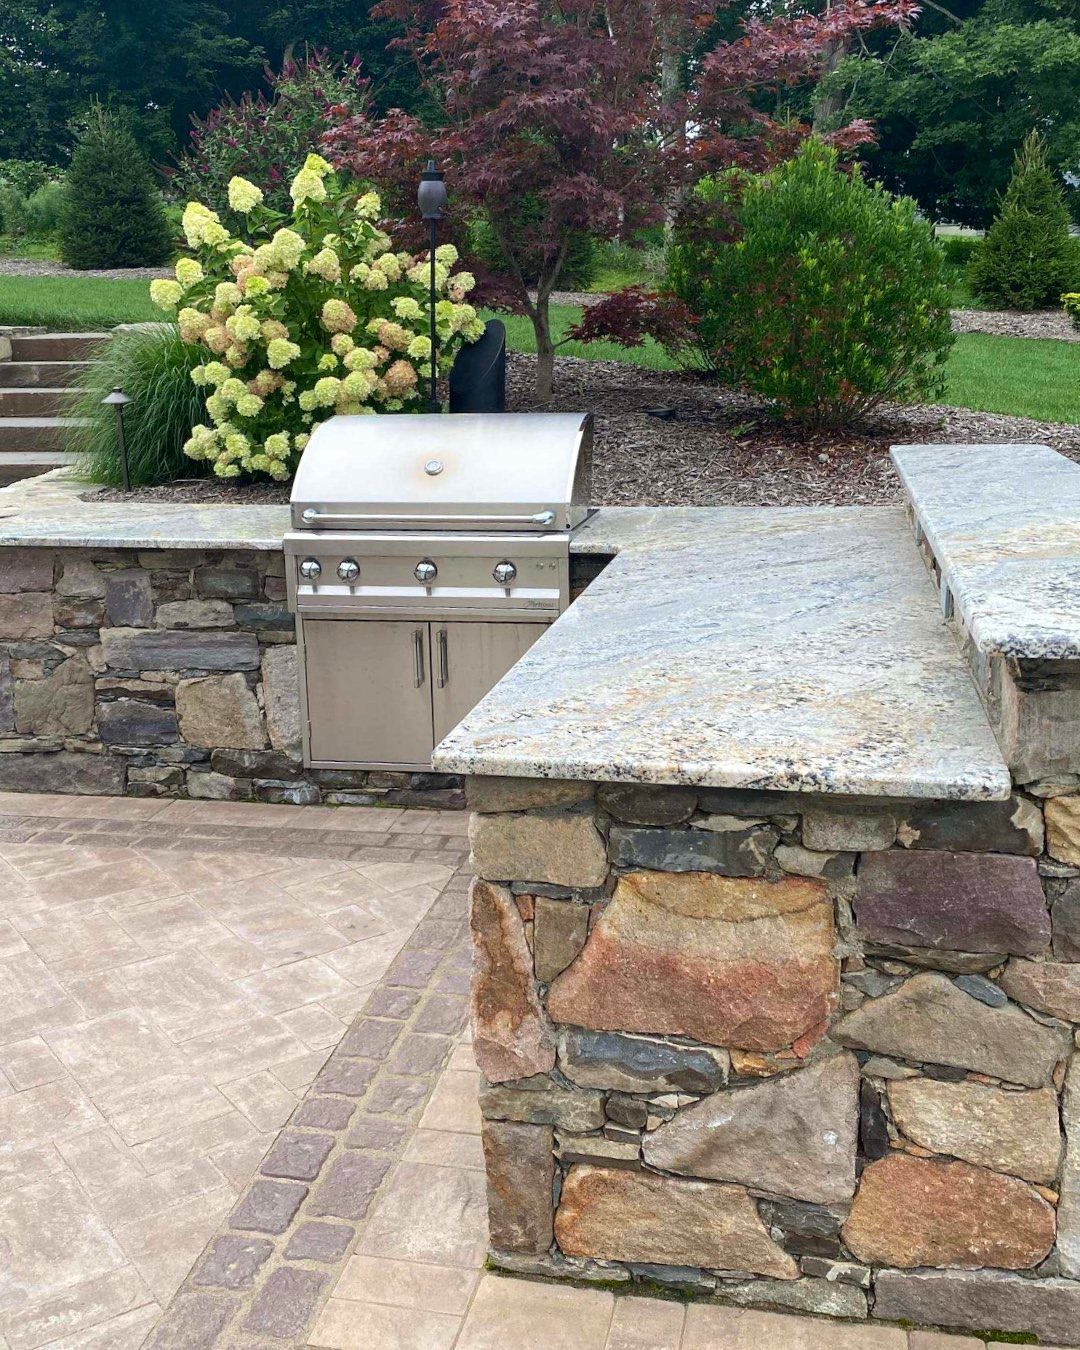
Stone and steel soften hard against hydrangeas and the low branches of a Japanese maple. The plants do the work of making the kitchen feel settled into the yard rather than dropped onto it.
Choose what grows in your zone and smells good at grill height: lavender, rosemary, and lemon balm handle heat and repel mosquitoes while you are working.
Leave enough clearance that nothing overhangs the flame or traps grease smoke. A landscaper can place the big shrubs; the pots and perennials you add yourself, one season at a time, until the edges blur.


【Authentic, Flavorful Pizzas】 Enjoy the taste of traditional wood or charcoal-fired pizzas right in your backyard. The heat-retaining cordierite pizza stone ensures perfect results with a quick 3-5 minute preheat at 550°F. Create delicious, restaurant-quality pizzas every time.

Pizza and BBQ At Same Time - Pizzello outdoor oven has 288 square Inches of total interior cooking area, which is capable of cooking 2 pizzas at the same time, or 2 roasting tins together. The middle rack can be removed so you get a full space to roast a whole turkey.
Planning Your Layout
The work triangle still matters outside. Prep area, cooking surface, and where plates go should sit within a few steps of each other, same as indoors.
Location drives everything else.
Before picking a material or a grill, check what utilities already reach the spot. I would walk the yard with a hose and an extension cord first, testing where things actually land.
Keep the outdoor kitchen within 50 feet of the house door; the indoor kitchen is where the backup ingredients live, and you will make that trip more than you plan to.
Location is the single most important decision you’ll make. Before anything else, confirm that your chosen spot has practical access to the utilities you’ll need: gas lines, water hookups, and electrical outlets.
— Exmark

【Ready to Use – No Gun Needed】Comes in a handy 5oz squeeze tube – just cut the nozzle and apply. The simplest caulk alternative for quick fixes and DIY tasks.

SUPER STRONG & DURABLE COMPOSITE SHIMS: Our plastic wedge shims, made from 100% high-quality recycled materials, boast 30% more load support and pressure capacity than wooden shims. These stackable shims are perfect for all your leveling, repairs, and home improvement projects, ensuring superior durability and strength.

SAFE: Ovation is a Food Safe, Water Based, Non Toxic, and High Performing sealant specifically designed for concrete countertops in the kitchen and beyond. Complies with FDA guidelines.
Cost Considerations
A functional outdoor kitchen can start at $200–500 if you build from reclaimed or simple materials. The national average runs $495 per linear foot for contractor builds, which is why doing the work yourself changes the math so much.
Start with a solid countertop and one heat source.
Everything else, sinks, storage, pizza ovens, can wait for a later weekend and a later budget. A basic roof or pergola overhead extends the cooking season and protects the equipment, so I would factor it in early rather than retrofitting.
Homeowners who sell later often see 100–200% return on an outdoor kitchen, though renters should build for the years they will actually use it.
Materials to Use
Galvanized steel, concrete, and treated wood each handle weather that ruins indoor materials. Marine-grade or exterior-grade plywood works if every edge is sealed; standard plywood delaminates fast.
Cement board replaces drywall anywhere it faces rain. Exterior-rated paint or stain is the only kind that survives UV; regular indoor paint peels within a season.
What fails outdoors: MDF or particleboard, even the water-resistant kind, swells and falls apart.
Cheap laminate countertops bubble in direct sun and swell at the edges. Composite materials hold up in harsh weather if they are heavy enough to stay put; tropical storms have tested that for some builders.
For any sink, plan how water leaves.
Incremental Building
Build what cooks first, then add what supports it. One solid counter and a grill or burner is a working kitchen; the rest is convenience you buy later.
I would pour the concrete countertop or stack the cinder block base one weekend, run the gas line or set the propane tank, and cook on it that same week.
The smoker, the pizza oven, the bar island with stools, each gets its own project slot and its own budget line.
Open shelves below the counter can start as bare studs and gain lumber when you have the scrap; a pergola overhead can wait until you know which way the afternoon sun actually hits.
Adding over time also lets you test what you actually use. The feature that looked essential in March may look optional by August.