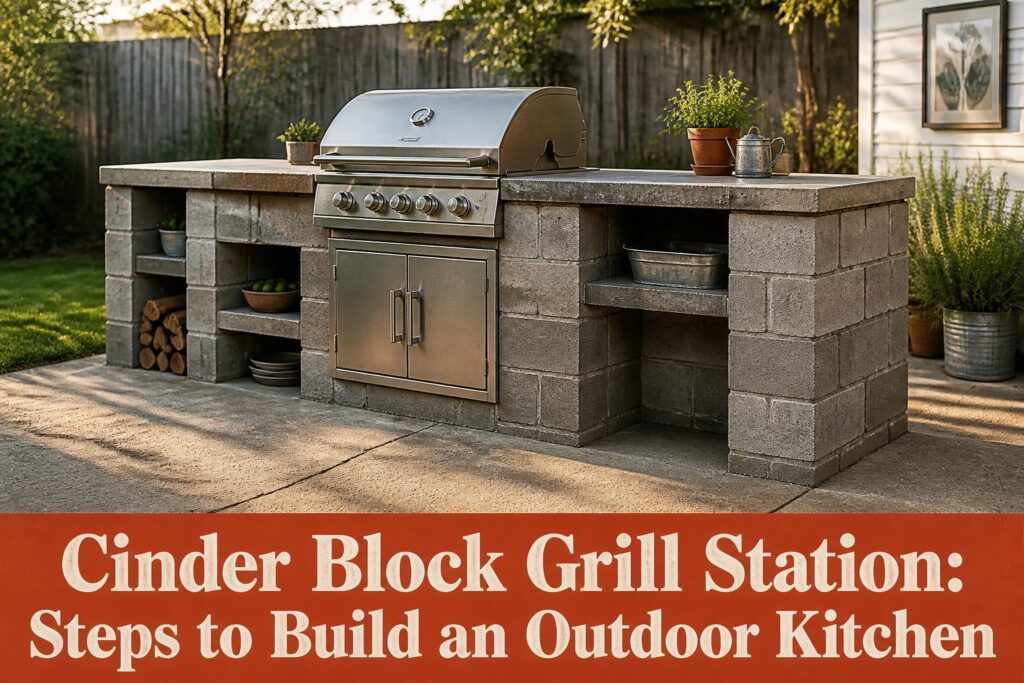
The cheapest path to a permanent outdoor kitchen is a stack of standard cinder blocks and a bag of mortar, but the permanence is literal: a half-block error in your first course becomes a leaning wall by the sixth, and cured concrete offers no second chance.
That 8 x 8 x 16 inch grid governs every cutout and counter span; ignore it and you are grinding block with an angle grinder instead of stacking.
[link-whisper-related-posts]1. Create Plans for the Grill Station
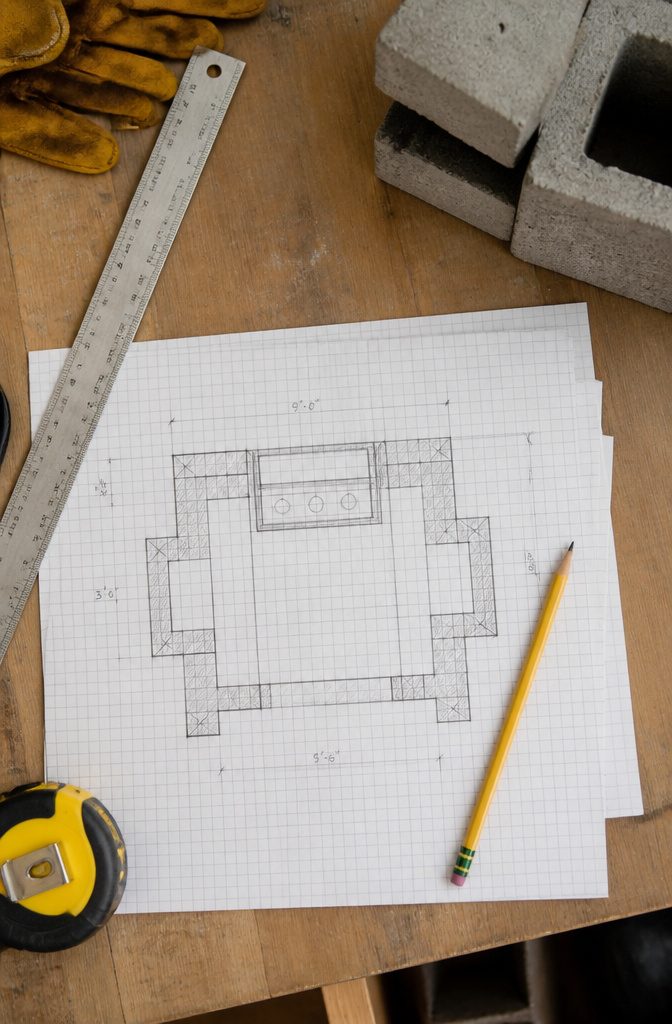
Every measurement in a cinder block grill station locks to the 8 x 8 x 16 inch block size, which means your plan is not a sketch; it is a grid.
Shift the grill cutout by half a block and you are cutting blocks, not stacking them, and that difference costs an afternoon and a blade you did not budget for.
I learned that after drawing a station on graph paper without checking the block dimensions against the grill base; the cutout was two inches shy, and two inches of cinder block is not a gap you shim.
The 3-foot clearance on all sides belongs in the first draft, not after you have placed the last block.
That is the working room for the lid, for the tongs, for the moment the grease tray slips. Draw it in now because retrofitting space into a block structure means rebuilding, not adjusting.
I mark the grill footprint first, then measure the three feet outward in every direction, and only then fit counters and storage into what remains. Mirrored sides help flow, but appliance cutouts are where most plans fail.
My read is that symmetry helps guests move, but the cutout dimensions are what keep the project from becoming a demolition. Get the grill opening exact, build the rest around it, and let the blocks decide the rhythm.

Spacious Double-Layer Storage Space – Designed with a large two-tier cabinet and a spacious 27.5" W × 19.4" D storage area, this outdoor grill cart provides ample room for cookware, BBQ accessories, kitchen accessories, plates, propane tanks, and grilling essentials. The 36.2" height offers comfortable access while keeping everything organized and within reach.

Ultimate Outdoor Prep Station: Store grilling accessories and party items, with a stainless-steel top, rolling wheels, and adjustable legs for use as a BBQ grill, outdoor bar, serving cart, or prep table.

All-in-One Outdoor Kitchen Hub: The VINGLI Outdoor Grill Table Cart transforms any space into a fully functional cooking station. With its large built-in storage cabinet, sturdy prep table, and integrated accessories like a bottle opener and seasoning tray, it’s designed to keep everything organized and within easy reach—perfect for patio parties, home barbecues, or everyday outdoor cooking.
2. Prepare the Site
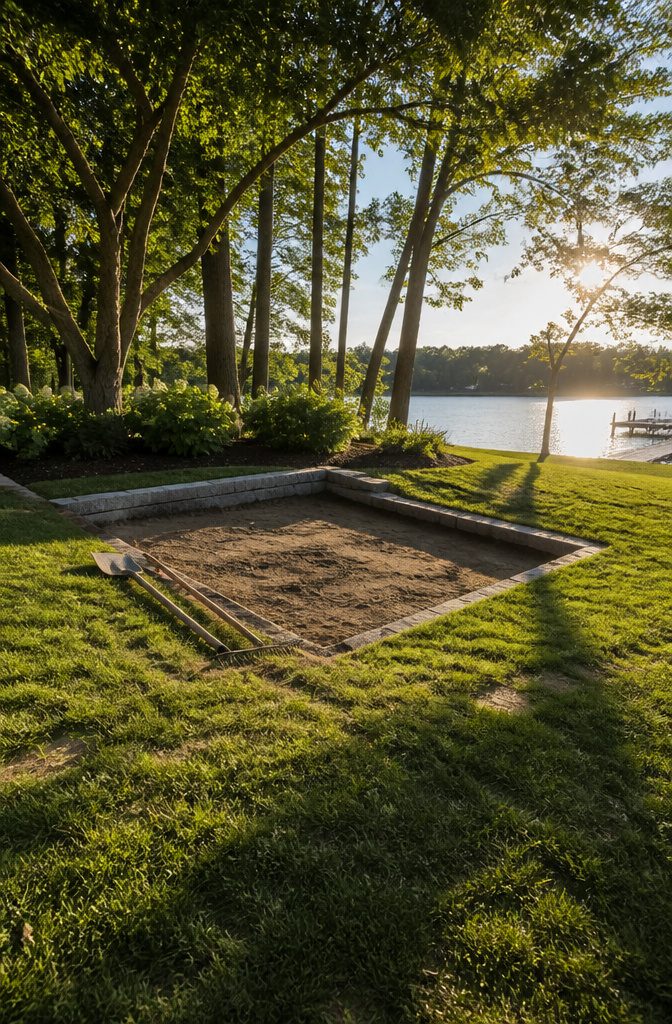
The ground under a cinder block grill station has to do more than look flat.
In most of the country, the footing needs to sit below the frost line or freeze-thaw cycles will heave the wall out of level by the third year.
Stone veneer pops first, then doors stop latching, then the whole station leans like a shed built on skimpy blocks.
I learned this watching a neighbor’s weekend project turn into a teardown.
He’d cleared sod, leveled with a rake, and started stacking. Two winters later his counter had a three-inch twist and the grill frame had cracked.
The fix meant pulling every block, trenching to depth, and pouring a real base. Double the work, triple the cost.
Pouring that footing also means nailing down utilities before the concrete goes in.
Gas, electric, water: once the pad cures, you’re not cutting a new channel without a saw and a prayer. Coordinate the trades in one window, or plan on running everything surface-mounted later.
Cold-climate readers, take the frost-line requirement seriously. Local code offices list the depth; it varies by county, not by ambition.
The rest of you still need a compacted, drained base. Cinder block is heavy, wet soil settles, and "close enough" becomes "out of plumb" faster than you’d think.

DRAINAGE AND VENTILATION : These screens cover block openings to allow air flow while preventing debris from entering foundation walls or garden structures

【Replace】The Foundation Auto Vent Replace manual vents. Fits standard 8 X 16 inch vent openings. Automatic replacement foundation vent for ventilating crawl spaces. Automatically fully opens at approx.70°F and closes at approx.40°F. Saves energy and lower risk of frozen pipes. Helps prevent foundation decay. 57 square inches of net free ventilating area. Quality you can trust.

【Replace】The Foundation Auto Vent Replace manual vents. Fits standard 8 X 16 inch vent openings. Automatic replacement foundation vent for ventilating crawl spaces. Automatically fully opens at approx.70°F and closes at approx.40°F. Saves energy and lower risk of frozen pipes. Helps prevent foundation decay. 57 square inches of net free ventilating area. Quality you can trust.
3. Lay the Cinder Blocks
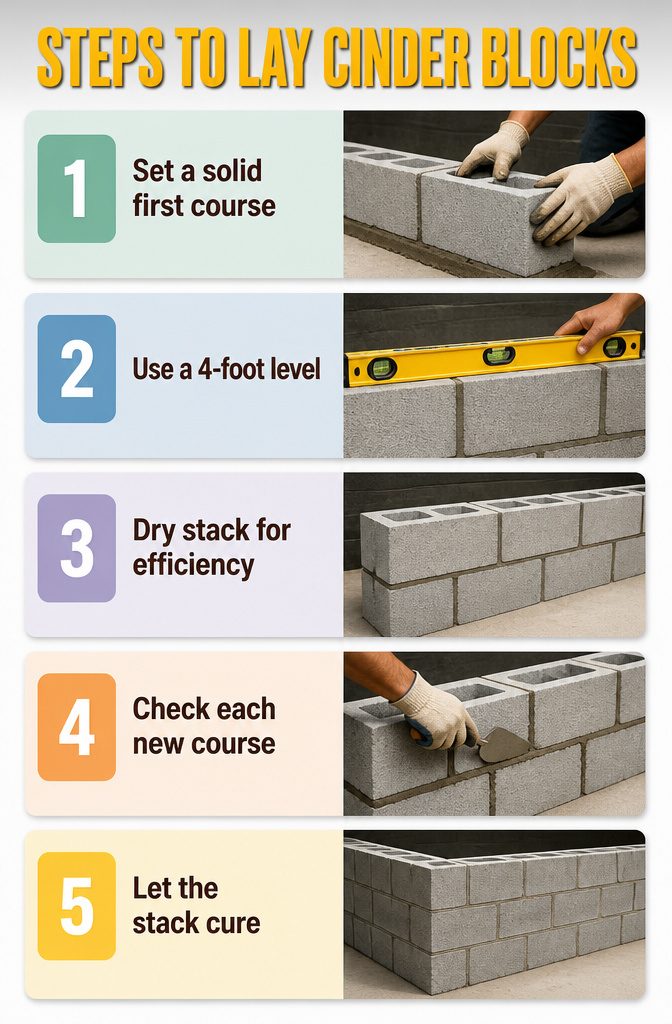
- The first course is where the whole build lives or dies. I set mine twice, scraping the mortar back to mud and starting over, because a bubble off on layer one becomes a lean by layer three. Mortar goes down in a bed about 3/8 inch thick, blocks pressed in and tapped to level, and you check every single one with a 4-foot level before the mix skins.
- Dry stacking saves an hour; mortaring between layers saves the station. The bond is near-unbreakable once cured, and for the price, the extra bag of Quikrete is worth it. Cinder blocks run about $1.49 each at most big-box stores; a simple two-course station takes roughly thirty blocks, so the wall itself lands under $60. The national average for a pro-built outdoor kitchen runs $12,000–$13,000, which puts the math in perspective.
- Each new course needs the same check: level across, level end to end, and a look back at your plan for appliance openings. Mortar squeezes out the joints; scrape the excess with your trowel while it is still soft. Let the whole stack cure before anything else touches it.

QUIKRETE Construction Grade Mortar Mix of Masonry Cement and Graded Sand for Laying Brick, Concrete Units, and Stone, 10 Pounds
AUTHENTIC – A premium quality mortaring compound to accurately assemble miniature cinder block or red brick structures. The ideal ‘glue’ for any mini construction worker. Includes 4oz of mortar mix and an application stick, which will be plenty enough to complete the average project.

READY TO USE: Preblended, just add water and go!
4. Apply a Masonry Scratch Coat
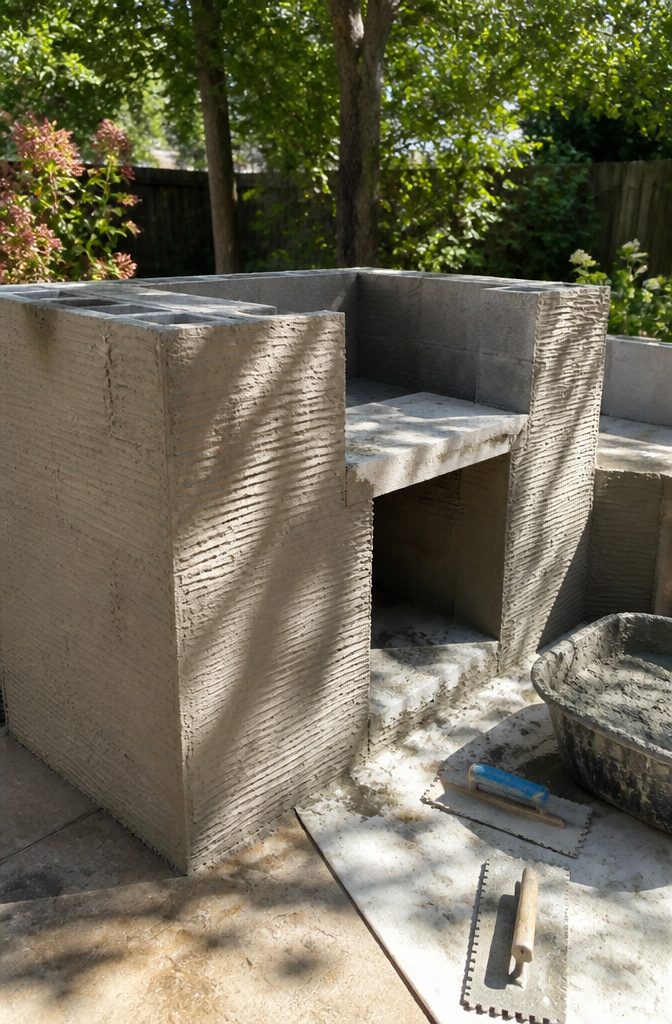
A scratch coat is the rough layer of mortar that sits between the cinder block and whatever finish you plan to show the world.
Cinder block alone is too smooth and too porous in the wrong ways for stucco, stone, or tile to grip properly. The mortar fills the voids and creates a surface with actual teeth.
Metal or fiberglass lath gets attached to the entire exterior first. This gives the mortar something to hold onto that the block itself won’t provide.
Spread an even layer of mortar with a trowel, then run a notched trowel across it to create horizontal grooves parallel to the ground. Those grooves are what the finish material physically locks into.
If you skip this step or rush the cure, the finish layer cracks or falls off in sheets.
One source says to scratch while the base coat is green; the other waits a full day. For tile, set while the scratch coat is still wet.
For brick or stone, let it cure fully before the next step. Mixing these up means re-doing the work in a season or two.

⭐【Durable Premium Material】Crafted with food-grade 304 stainless steel countertop and weatherproof resin body, this grill cart effectively fights rust, corrosion and damage from harsh sun, rain and humidity, delivering solid long-lasting performance whether placed inside your house or on outdoor patios and backyards.

Precision Opening: Overall dimensions: 774x533x45 mm / 30.5x21x2 inches, installation size: 27x18inch/689x448mm, it is recommended to reserve an additional 0.08inch/2mm on this basis for better operation. The door is designed specifically for outdoor kitchens and barbecue islands. With precise dimensions, it is easy to process, install, or dismantle. Available in various sizes and styles, it is perfect for indoor/outdoor kitchens and all other outdoor weather conditions.

Fully Electric Grilling: Enjoy the authentic BBQ experience without charcoal, propane, or flare-ups. This fully electric grill is perfect for apartments, patios, balconies, and other spaces where open flames aren't allowed
5. Apply Finish Material
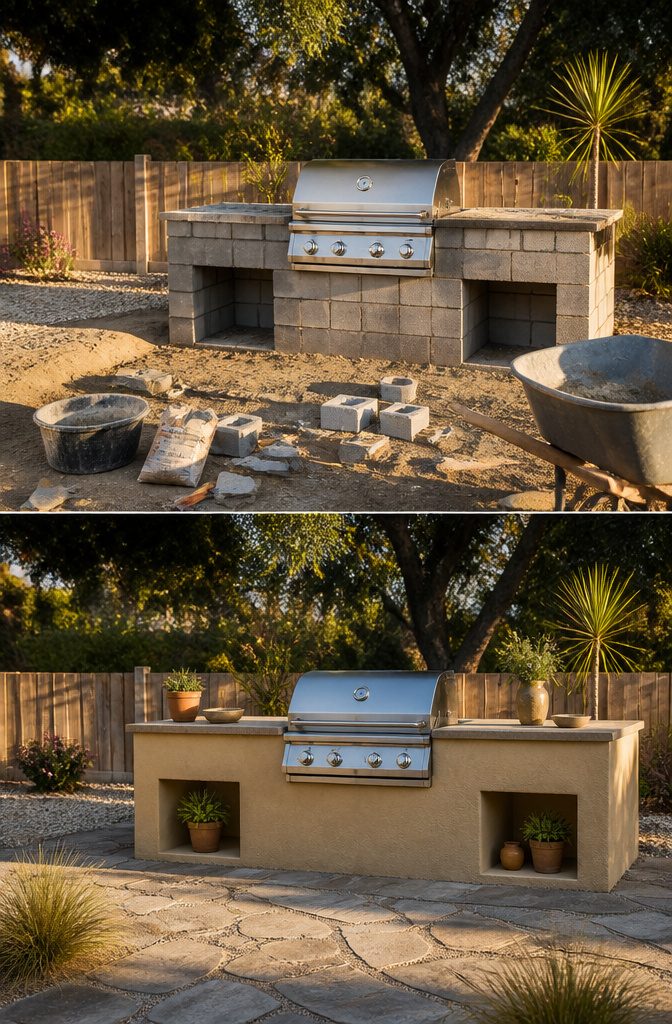
Stucco goes on with a trowel right over the block, no scratch coat needed.
That sounds simpler until you’re standing there trying to smooth it out and texture it at the same time. One uneven pass and you’re living with that ripple every time you flip burgers.
Tile and stone both need that scratch coat first, but the timing splits. For tile, you start laying while the coat is still wet so the mortar underneath stays workable.
Stone or brick gets the same scratch coat, then you let it cure before you butter each piece with extra mortar and press it in from the bottom up.
Once stone is set, you cannot go back and adjust it, so the slow cure matters.
Climate exposure is where my own reading splits from what most guides emphasize. Stucco’s weakness is hairline cracking through freeze-thaw cycles; the rigid shell has nowhere to move.
Tile’s grout lines handle movement better, but water behind the glaze in a northern winter pops pieces off. Stone fares best if the mortar bed breathes, though wet-set stone in a damp climate traps moisture against the block.
Stucco wins on speed and cost for a dry region; stone wins on longevity if you have the weekend to do it right and the climate to let it dry.

30-Feet No-drip Pipe Tape Can Be Used On Both Hot And Cold Pipes Insulates Hot Water Pipes From Heat Loss Stops Condensation On Cold Water Pipes Very Easy To Apply, Or Remove
6. Prepare the Countertop Surface
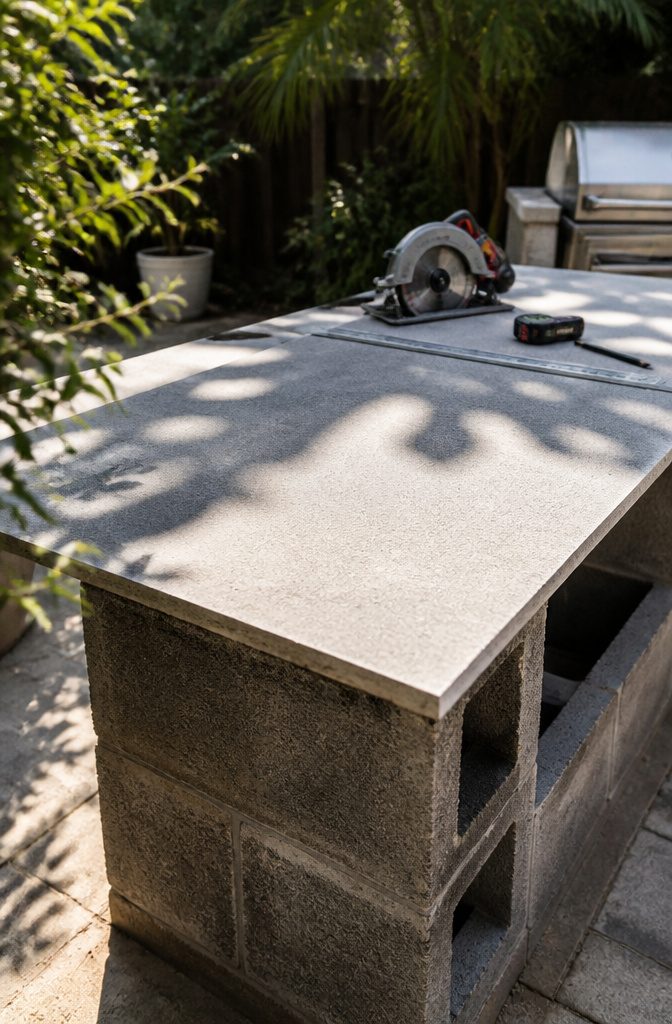
Standard wall construction carries its own weight and a little insulation, but it was never meant to shoulder a countertop loaded with a grill, cutting boards, and the occasional elbow.
For a small, straight run of block, the top course might handle a light surface without complaint. Anything larger, and the span starts to work against you.
That is where Hardie backer board earns its place. The process is straightforward: measure the footprint of your island top, cut the backer board to fit, and let it rest across the open span before the countertop ever touches down.
It adds a rigid layer between the block and the finished surface, turning a series of individual cells into something that behaves more like a solid table.
I have seen islands skip this step and seem fine for a season, then show a hairline crack where the surface flexed more than the stone or concrete ever wanted to.
Backer board is cheap insurance, and the afternoon it costs pays back every time you set down a heavy Dutch oven without wondering what is giving underneath.

Heavy-Duty Construction with 300 lbs Capacity: Built with a 201 stainless steel table, 0.8mm powder-coated iron tubes, and a durable galvanized sheet back panel, this cart offers a robust 300 lbs load capacity. The 4 caster wheels (2 lockable, 2 non-lockable) and side handle provide both stability and smooth mobility around your patio.

【Universal Fit for Multiple Grills】 Designed to fit Blackstone 17"/22" griddles, Ninja Woodfire outdoor grill, Weber, Ooni pizza ovens, and other tabletop grills, making it the perfect portable stand for versatile outdoor cooking.
7. Place or Make the Countertop
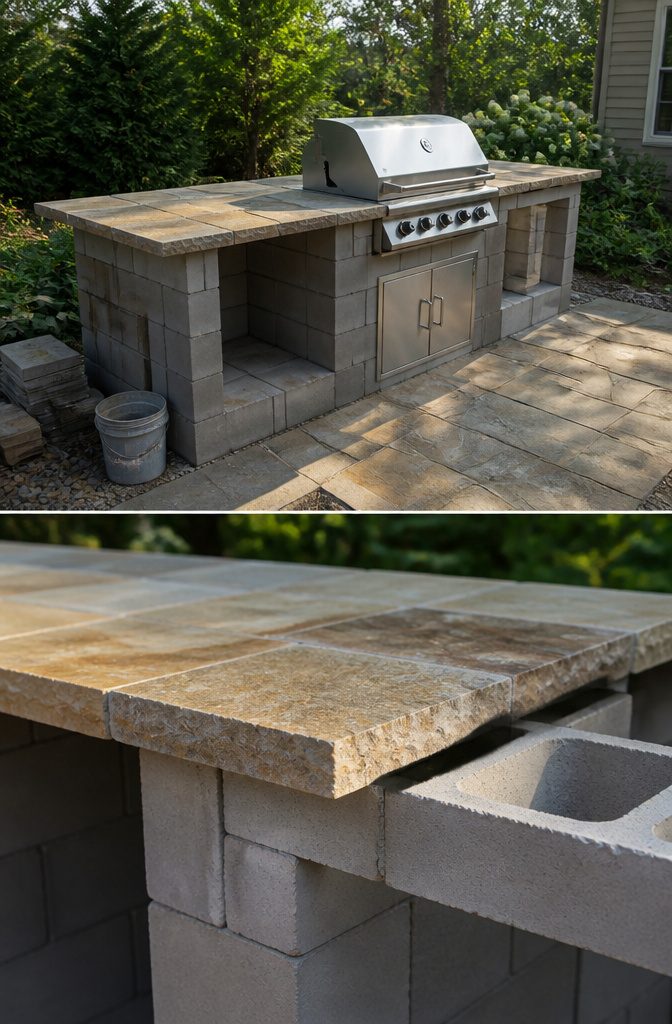
The countertop is where a cinder block grill station either looks finished or looks like a pile of blocks. Two paths get you there, and only one of them respects a weekend budget.
Hiring a fabricator for stone or solid surface produces a clean top with no visible joints. They measure on site, cut to fit, and install.
The result is professional, but the cost and timeline balloon fast. For a station built on cinder blocks and a Saturday, that route never made sense to me.
Pouring your own concrete is the DIY alternative.
You build a mold directly on the block columns, mix, pour, and wait for cure. The skill ceiling is real.
A bad pour cracks, stains, or drains unevenly, and fixing it means starting over. I looked into it once for a side project and backed out after watching a neighbor’s countertop develop hairline fractures in the first freeze.
The field-tested middle path is 16 x 24 inch patio stones at $6.98 each.
Cinder blocks measure 8 x 8 x 16, so the stone overhangs evenly on a standard column layout. Stacked eight blocks high plus the stone lands the surface at about 34 inches, comfortable for most adults to work at.
The stones are not perfectly flat, flat enough for a platter or a drink, and the texture hides minor imperfections in your block work.
For a simple station under $60 and an hour of assembly, this is the option that actually gets finished.

【Replace】The Foundation Auto Vent Replace manual vents. Fits standard 8 X 16 inch vent openings. Automatic replacement foundation vent for ventilating crawl spaces. Automatically fully opens at approx.70°F and closes at approx.40°F. Saves energy and lower risk of frozen pipes. Helps prevent foundation decay. 57 square inches of net free ventilating area. Quality you can trust.

【Replace】The Foundation Auto Vent Replace manual vents. Fits standard 8 X 16 inch vent openings. Automatic replacement foundation vent for ventilating crawl spaces. Automatically fully opens at approx.70°F and closes at approx.40°F. Saves energy and lower risk of frozen pipes. Helps prevent foundation decay. 57 square inches of net free ventilating area. Quality you can trust.

【Replace】The Foundation Auto Vent Replace manual vents. Fits standard 8 X 16 inch vent openings. Automatic replacement foundation vent for ventilating crawl spaces. Automatically fully opens at approx.70°F and closes at approx.40°F. Saves energy and lower risk of frozen pipes. Helps prevent foundation decay. 57 square inches of net free ventilating area. Quality you can trust.
8. Install Appliances
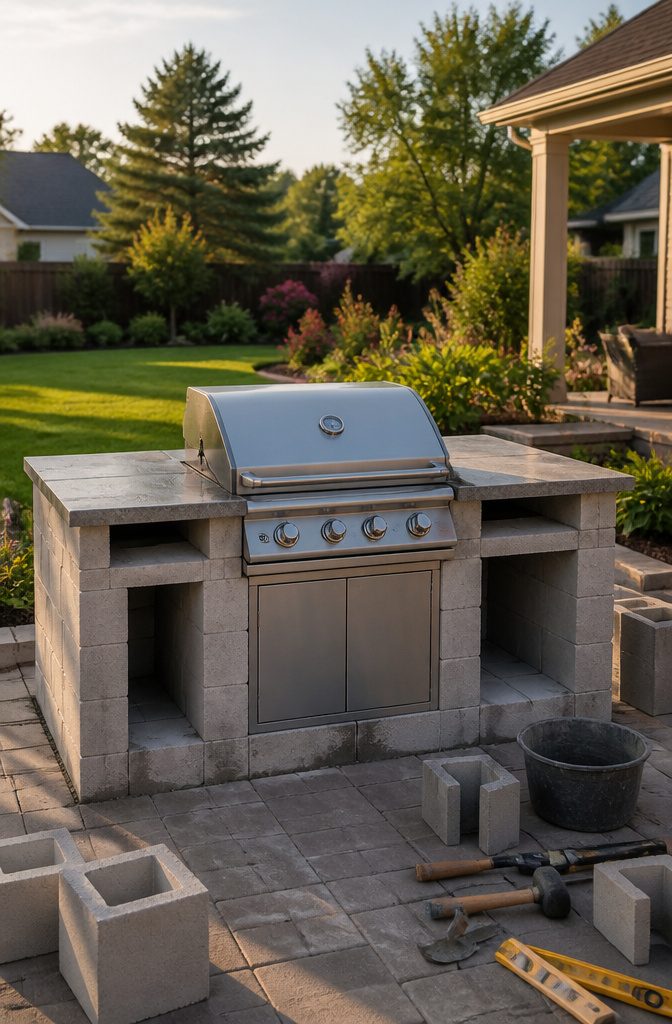
Cinder block does not forgive a half-inch error the way wood framing does. Once the mortar sets, the opening is permanent, and a grill or burner that does not fit becomes a permanent problem.
Measure the appliance, then measure the block bay, then measure again before you lay the final course around the cutout.
Leave a finger’s width around grills and fridges so you can slide them out for service. One camp leaves a half-inch gap on each side for ventilation, especially for a fridge or cooler bay.
The other treats a snug slide-in as the goal, with the understanding that too small is fixable and too large is not. If the opening is narrow, you can shave block with a grinder.
If it is wide, your choices are an ugly gap or a patch that breaks the visual line of the wall. Neither option looks built-in.
I would rather cut once too small and grind to fit than trust my first measurement and end up staring at a half-inch slot of daylight around a $400 burner.
The same logic holds for door swings: plan the arc before the block goes up, because a fridge door that collides with the grill lid is a mistake set in concrete.

QUIKRETE Type S Mortar Mix of Masonry Cement and Graded Sand for Structural and Non-Structural Applications, 60 Pounds

Refractory mortar that is ideal for joining or repairing fire brick and masonry flue tile in any gas or wood fireplace and wood, coal, or pellet stove chimney

Complete 62-Piece Hanging Solution for Every Project: This kit includes 7 types of hooks to handle any hanging need: 40 small nails (5 lb capacity) for lightweight frames; 4 medium hooks (13 lb) for standard photos; 4 large hooks (17 lb) for heavier art; 4 extra-large hooks (30 lb) for substantial pieces; 4 four-footed concrete hangers (22 lb) for maximum stability on hard walls; 2 heavy-duty frame hangers (22 lb) for bulky items; 2 auxiliary brackets (8 lb) for picture frames; plus a mini level and auxiliary clip to ensure alignment every time
Why Cinder Block Lasts Outdoors
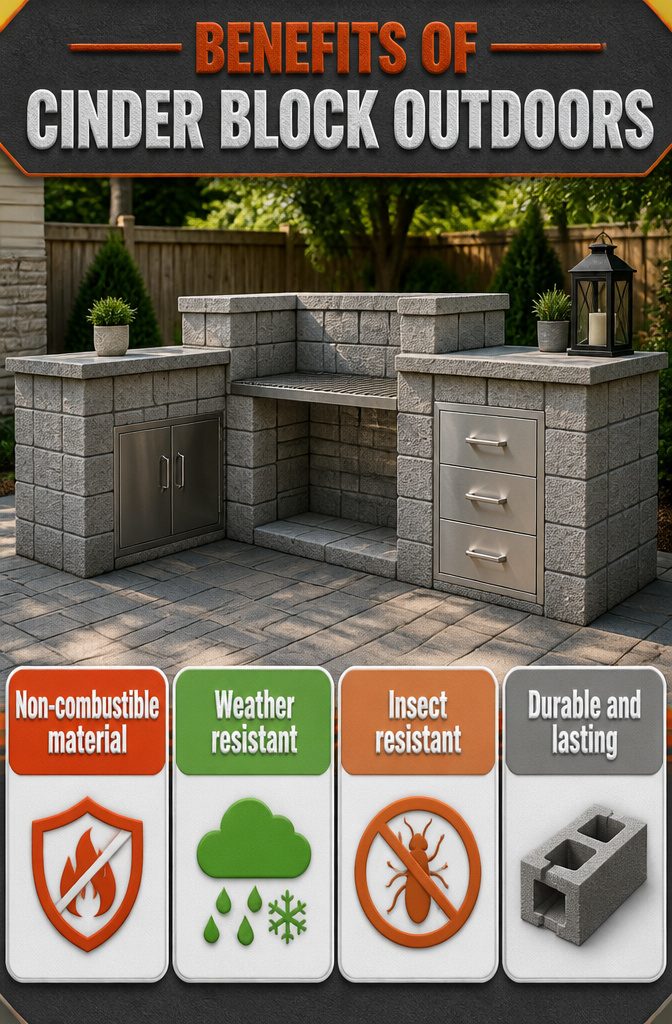
Concrete does not rot, rust, or catch fire. Those three properties are why I accepted the heavier labor of a cinder block build instead of framing with wood and hoping for the best.
A wood outdoor kitchen sits next to a heat source that regularly hits 500°F or more. Wood is combustible.
Cinder blocks are non-combustible material, which removes that entire category of risk. No treated sealant to maintain, no anxiety about a grease flare-up finding a seam.
The durability extends past fire safety.
Rain, snow, and the freeze-thaw cycle that destroys lesser materials leave cinder block alone. The block itself is mineral; it does not provide food for mold or interest to termites.
Left unfinished, it weathers to a gray that some homeowners prefer. Coated with stucco or stone veneer, it becomes whatever style the rest of the yard needs.
Concrete block absorbs heat all day and releases it after dark, which keeps cooking steady but means the station stays hot to the touch.
Moving 8x8x16 inch blocks by the dozen is slow work, and the footing has to be level or the whole structure tells on you.
But once the courses are set and the grout cures, the station outlasts the grill insert it holds.
For a weekend builder spending a few hundred dollars and expecting to cook on this thing for years, that permanence justifies the sweat.
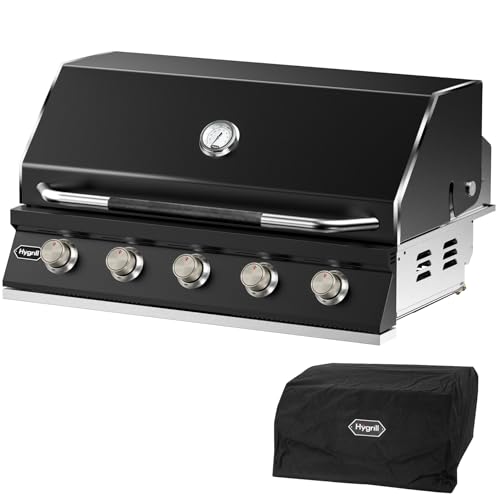
【Powerful Burners】The built-in grill has five 14,000 BTU tube burners, delivering exceptional grilling and searing results. With a total cooking power of 70,000 BTUs.

【Solid Construction】Made of professional grade stainless steel, this grill cart is built to withstand the rigors of frequent use and exposure to the elements;

Strong Flame: Equipped with 15,000 BTU burner, this single side burner provides powerful heat output for easy frying, stir-frying, boiling, and grilling. The built-in burner ensures stable cooking even in windy conditions
Customization Without a Designer Budget
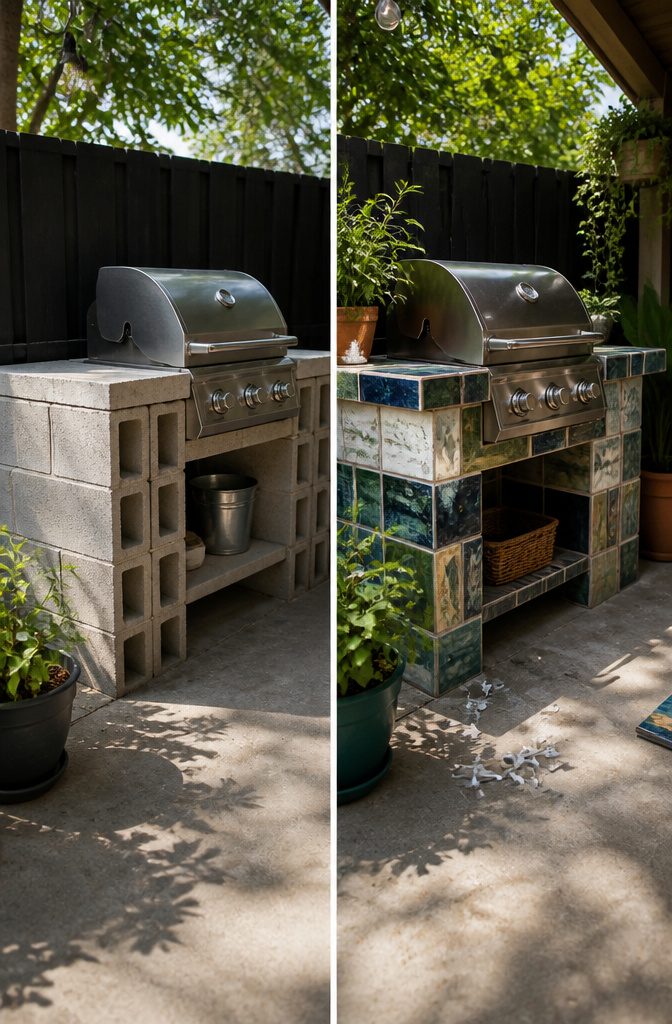
Raw cinder block is honest about what it costs, which leaves room to spend where it shows.
The core structure stays cheap: standard 8 x 8 x 16 inch blocks stacked to height, with the rough sides faced toward the back where no one looks. What faces the patio is where the project becomes yours.
Stone, tile, stucco, brick, or paint all sit on that same skeleton. One builder used two light coats of a sand-cream outdoor paint and let the block texture ghost through.
Another topped the columns with 16 x 24 inch patio stones for a counter height of about 34 inches including the nearly 2 inch stone. The stones were not perfectly flat, but flat enough to set down a drink or a platter.
The block is structural; the surface is the look.
A prefab island locks you into one finish. Here, a weekend of surface work and a few hundred dollars in tile or stucco re-skins the whole station without touching the stack underneath.
Renters especially get the appeal: the investment rides in the finish material, not in masonry you would leave behind.
Labor, Tools, and When to Call a Mason
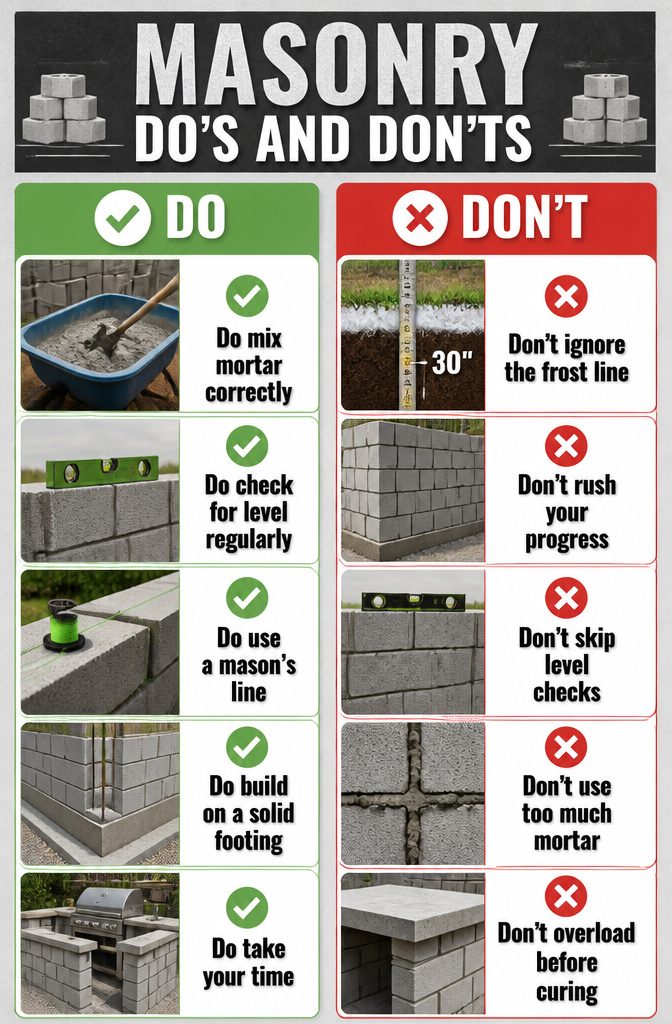
Mixing mortar by hand for a cinder block grill station is the kind of labor that sounds rustic until you are on hour two with blisters rising.
Concrete blocks run about 28–32 pounds each, and a modest grill station eats through seventy or eighty of them. The mixing itself is straightforward: water, type S mortar mix, a wheelbarrow and a hoe.
Keeping the courses level is where a first-timer’s Saturday unravels. Half a block out of plumb at the third course becomes three inches by the sixth, and at that point the wall leans like a shed after a flood.
I have watched a neighbor tear down five courses at dusk rather than face Sunday with a wobble that would not take countertop weight.
Structural safety sits apart from fire safety. A leaning block wall can collapse under a concrete countertop or simply from ground shift after the first hard freeze.
The fix is not more mortar in the joints; it is starting the course over with a mason’s line and a story pole, checking every two blocks.
If the lean shows up after the mortar has skinned over, concrete is unforgiving: you cannot shim it or slide it the way you can wood frame.
The national average for a professionally built outdoor kitchen runs $12,000–$13,000, which is what hiring a concrete contractor or specialized mason costs against your weekend and your back.
For me, the line falls at the footing. If the frost line in your area requires footings below 30 inches and you have never struck a grade or set rebar, that is the phone call worth making.
Everything above the frost line teaches itself with patience; everything below it, done wrong, heaves and cracks in year two.
Shade and Light for Evening Cooking
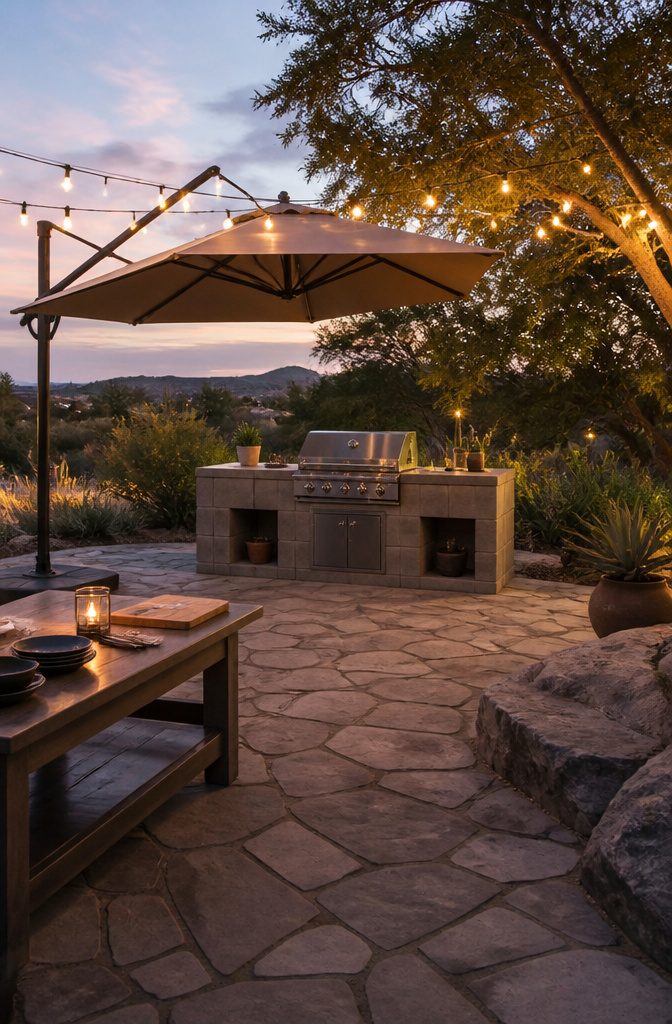
The right shade and lighting setup keeps a cinder block grill station usable after sunset, not just functional at noon. Here is what works without hiring an electrician.
- Cantilever umbrellas shade the grill and prep areas during peak sun. Position the base away from walkways and cooking heat, and secure it with weighted stands or concrete blocks. A model with tilt and swivel adjusts as the light shifts.
- Pergolas oriented north–south give balanced shade midday and softer light morning and afternoon. Retractable canopies or adjustable louvers control sunlight and airflow. Climbing jasmine or clematis along the beams adds fragrance; string lights across the rafters or LED strips tucked under ledges extend the space into evening.
- String lights spaced about one foot apart in a zigzag or grid above cooking and seating zones create a consistent glow. Warm white LED bulbs avoid the harshness of cool white or daylight tones.
- Deck lights recessed flush with stairs, walkways, and under counters prevent tripping. Place them every two to three feet with warm white bulbs, and choose marine-grade fixtures for weather resistance.
Frequently Asked Questions
How do you build a cinder block grill station?
You build it in eight stages: draw your plan on a grid tied to the 8 x 8 x 16 inch block size, pour footings below the frost line, lay each course dead level with mortar, apply a scratch coat, add your finish material, set backer board across the top, place or pour the countertop, then slide in the appliances.
The first course and the grill cutout are the two places where exact measurements matter most; errors there are nearly impossible to hide later.
Do you need footings for a cinder block grill station?
Yes. Cinder block is heavy and rigid, so any ground shift cracks the wall instead of flexing with it.
In most of the country that means placing the footing below the frost line; your local building office lists the exact depth by county. Without it, freeze-thaw cycles heave the blocks out of level within a few years.
What is the cost of a cinder block outdoor kitchen?
A professionally built outdoor kitchen averages $12,000 to $13,000 nationally.
A DIY cinder block grill station can stay far below that: the blocks themselves run about $1.49 each, so a simple two-course wall lands under $60, and 16 x 24 inch patio stones add roughly $7 apiece for countertops.
The main savings are in labor, but you pay with a full weekend of heavy work and the risk of a leaning wall if the courses wander off plumb.