These ideas run from free scraps to a quick supply run, and the one that belongs on your tree depends on which material is already in your house and how much of the weekend you want to spend.
[link-whisper-related-posts]1. Paper Star Ornaments
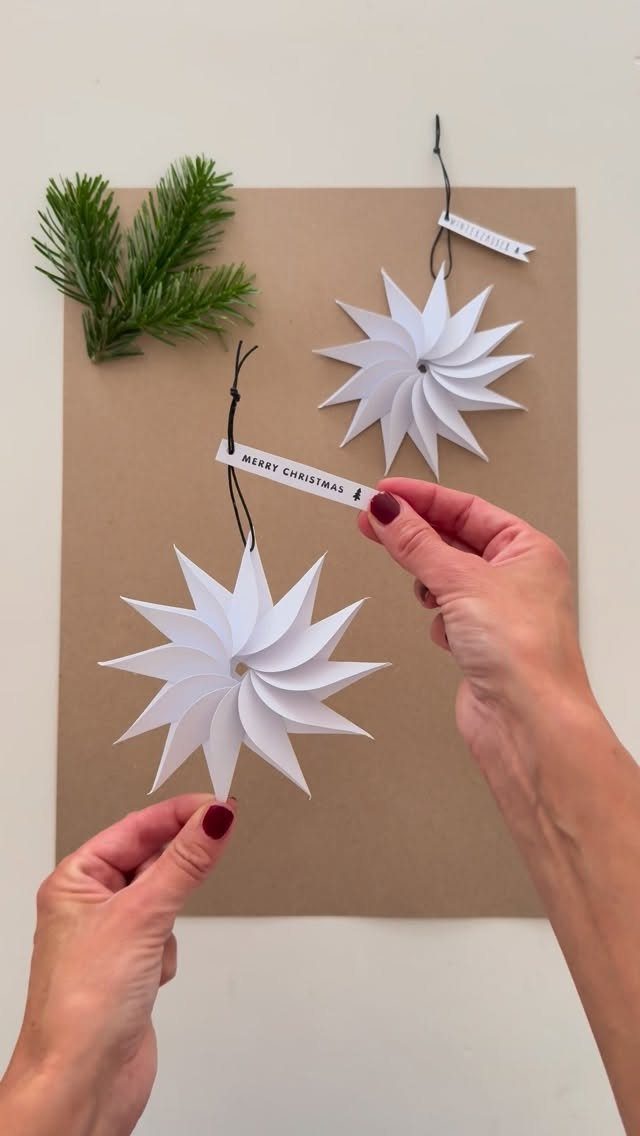
A folded paper star catches light differently than flat cutouts, with creases that cast small shadows on the tree. Any paper works: printer paper, old maps, the backs of failed prints, even wrapping paper scraps after the gifts are open.
The folds lock together without glue, which means a dry run costs nothing and a torn piece starts over in seconds.
Paint or glitter goes on after folding if you want it, though plain white against green branches reads cleaner than I expected. These scale down small enough for gift tags or up to sit on a mantel.

Package for Celebratory Aesthetics: you will receive 8 paper stars, each measuring about 5.91 inches/15 cm; Each paper star lantern is meticulously crafted to form a 3D design that's visually appealing; The 3D design creates a magical and romantic atmosphere, setting up a breathtaking Christmas spectacle

2. Clothespin Snowflake Ornament
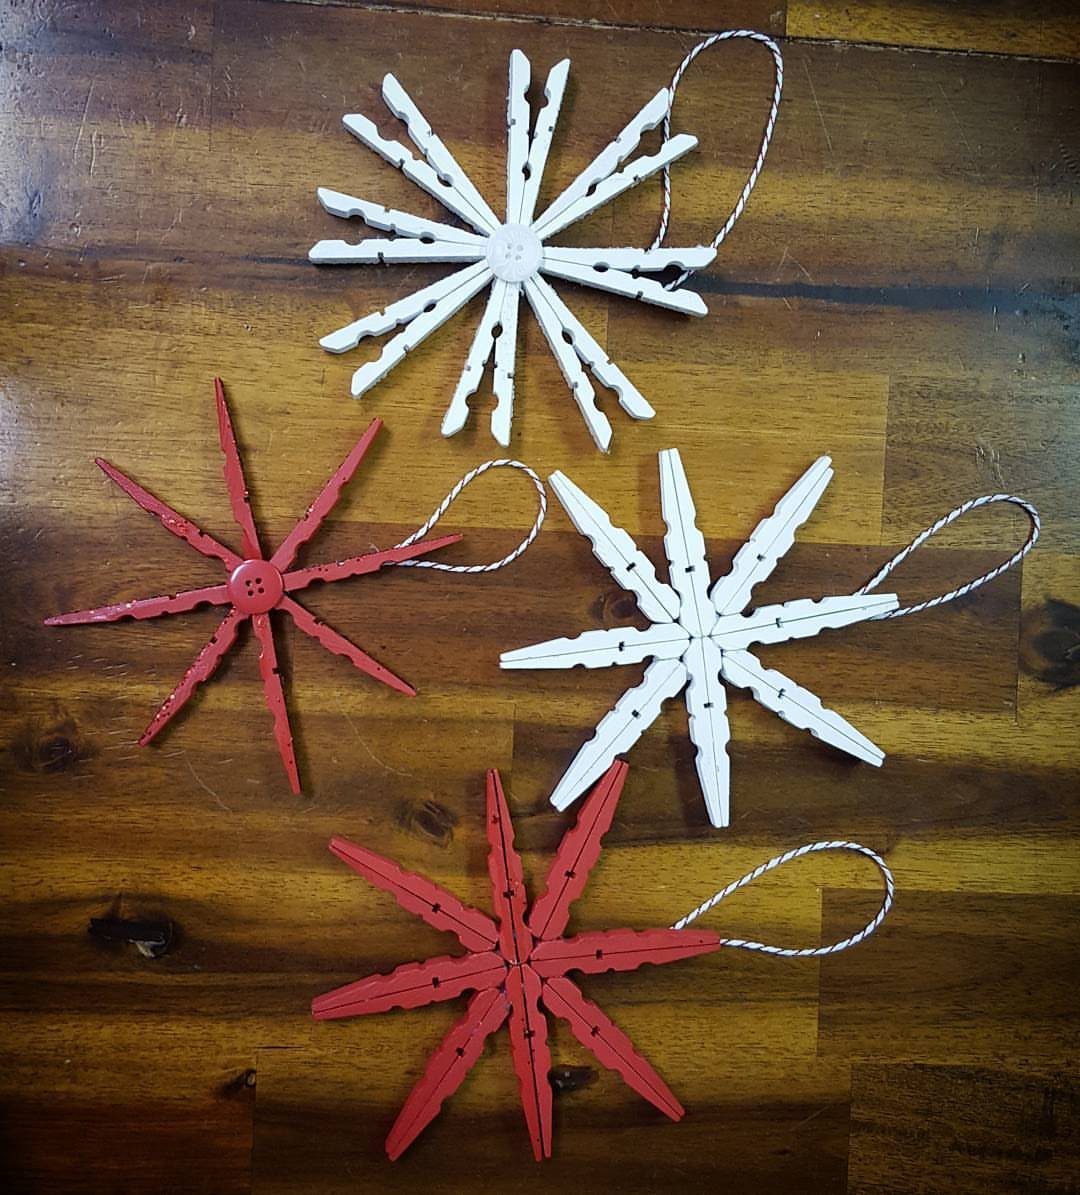
Wooden clothespins pull apart into 2 halves with a spring in the middle; halves glued flat-side-in make a snowflake with real geometry, not the lumpy kind.
Red and white paint reads Christmas immediately, though natural wood with a beeswax rub fits a Scandinavian tree if that is what you have.
The center needs something: a button, a bead, a pom pom, whatever is already in the junk drawer.
Twine hot-glued to the back holds the weight fine. My preference is matte paint over glossy; the grain still shows and the lights do not glare back.

Generous Quantity: this set includes 400 pieces snowflake wood slices in 10 styles, providing ample pieces to satisfy all your home and party decorating needs during the festive season

Sufficient quantity: you will receive 100 pieces of wooden snowflakes in different styles, and we provide 1 piece of cord for each wooden snowflake, the sufficient quantity can meet your various needs for Christmas decorations

With superb cutting technique, these wooden shapes have smooth touch.
3. Cinnamon and Applesauce Ornaments
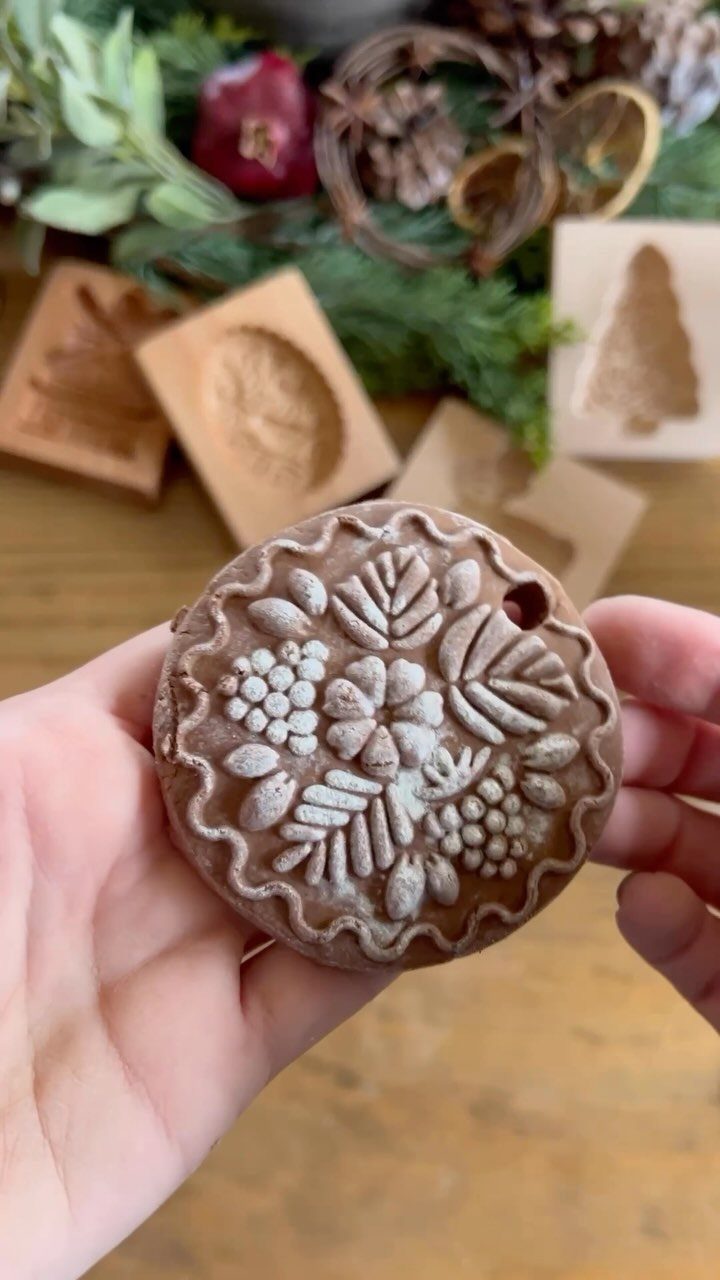
Cinnamon and applesauce ornaments smell like baking even years later, and that smell is why people still make them.
The dough is just those 2 ingredients worked until it holds together, rolled and pressed into shapes with whatever mold you have: cookie cutters, a carved wooden press, the rim of a glass for a plain circle.
Drying takes a day or two on a rack, not in the oven, though some people speed it low and slow.
The Rudolph version needs a red nose added after, but a simple round with a pressed pattern hangs fine and looks older than it is.
These are light enough for paper-thin branches and soft enough that a dropped one does not shatter.

Retro Charm: Brings a playful retro vibe to your tree with this festive green jello mold, complete with sparkling garnish details.

Size: About 13.6 cm long, 13.5 cm wide, 2.3 cm thick, 1pc

Handmade: All of our heirloom-quality ornaments are made from molten glass mouth-blown into exclusive molds, a hot liquid silver solution is added for color and vibrance.
4. Scrap Fabric Christmas Tree Ornaments
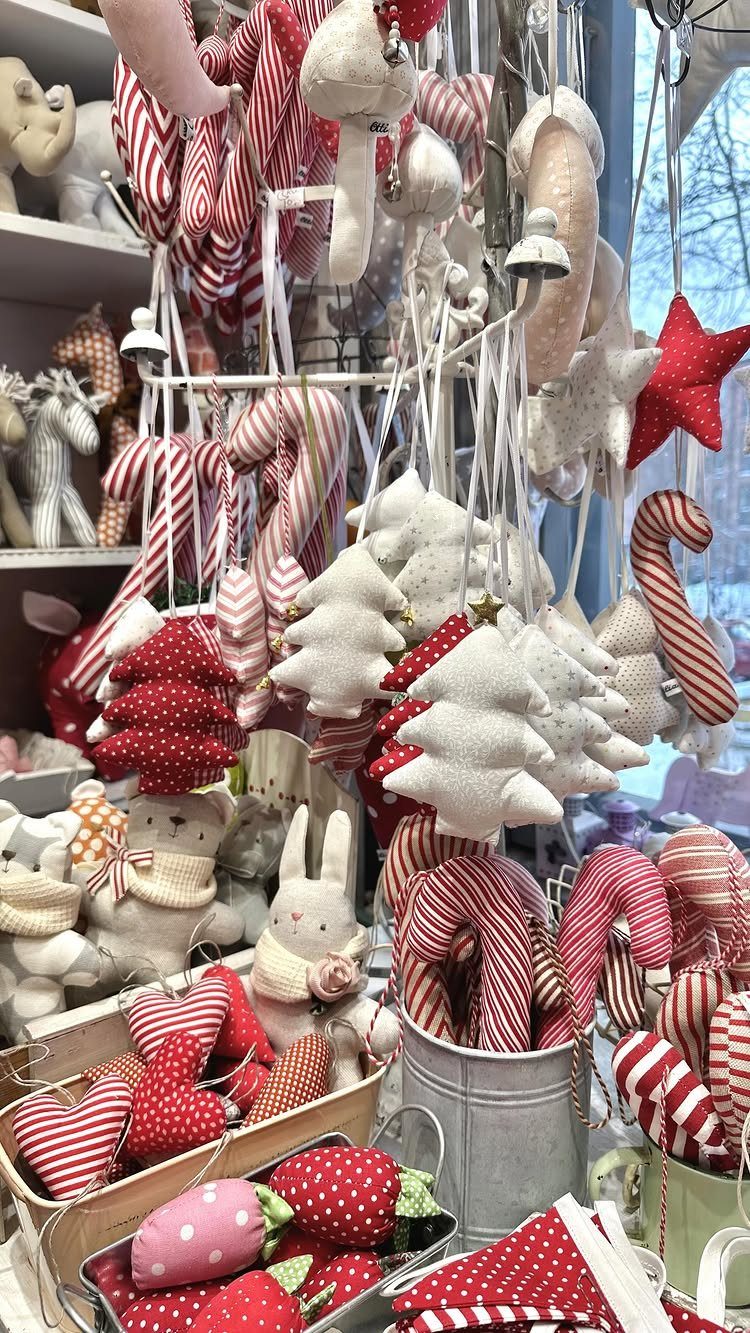
Fabric scraps become small trees with a triangle of cardboard inside for stiffness, or without it for something that droops a little like a real spruce weighted with snow.
Sewn edges last longer; glued edges work if the glue is fabric tack and you clamp until it sets. A cinnamon stick trunk on the no-sew version adds scent and covers any glue mess at the base.
Stuffing is optional: flat trees store easier, stuffed ones catch light on their rounded edges. The shop display shows every variation at once, which is useful for seeing what scale fits your tree before you cut.


Colorful elements: these felt Christmas trees are designed in lovely Christmas tree shape, with various shapes of small ornaments, such as present box, snowman, star, snowflake, candy, and so on, which looks more noticeable and striking, can easily attract others' attention
5. Salt Dough Handprint Ornaments
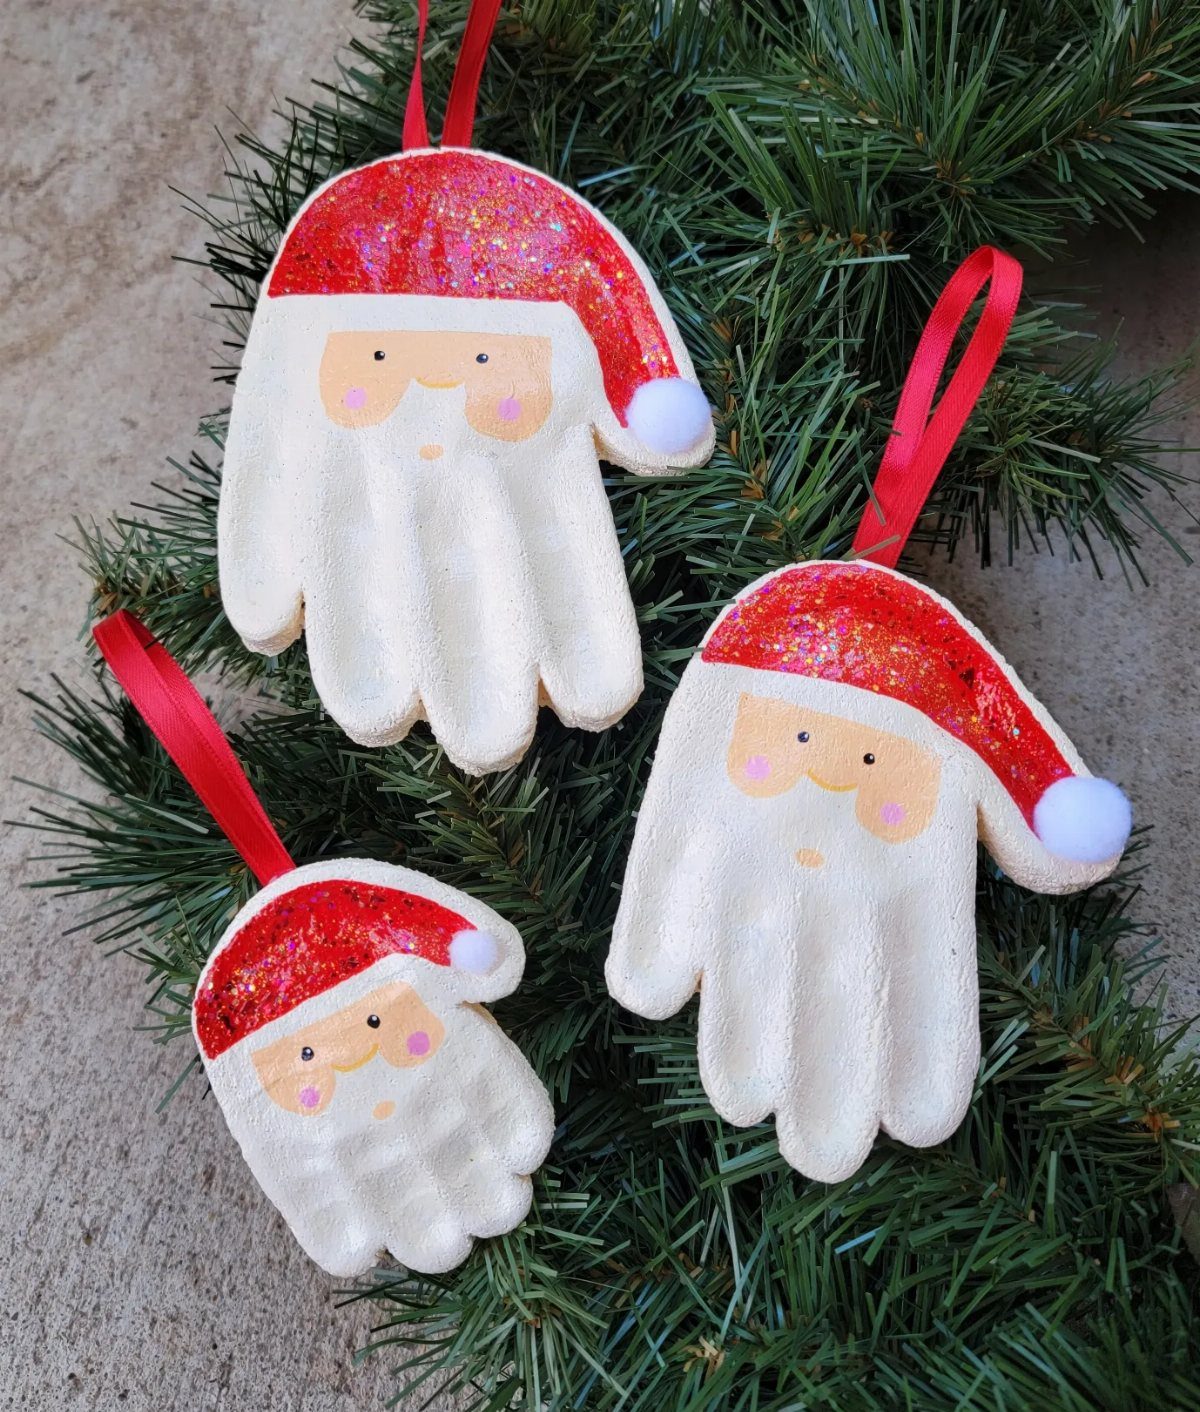
Salt dough costs almost nothing: flour, salt, water, and an oven. A child’s hand pressed in makes a Santa beard with fingers down, or a plain keepsake if you leave it unpainted.
Bake until hard all through, which takes longer than the surface looks; a soft center molds later. Paint goes on after cooling, acrylic or craft paint, then a ribbon through the hole you made before baking.
These darken slightly over years, which some people mind and I do not. The weight is real; hang them on wood or wire branches, not the finest tips.
6. Felt Gnome Ornaments
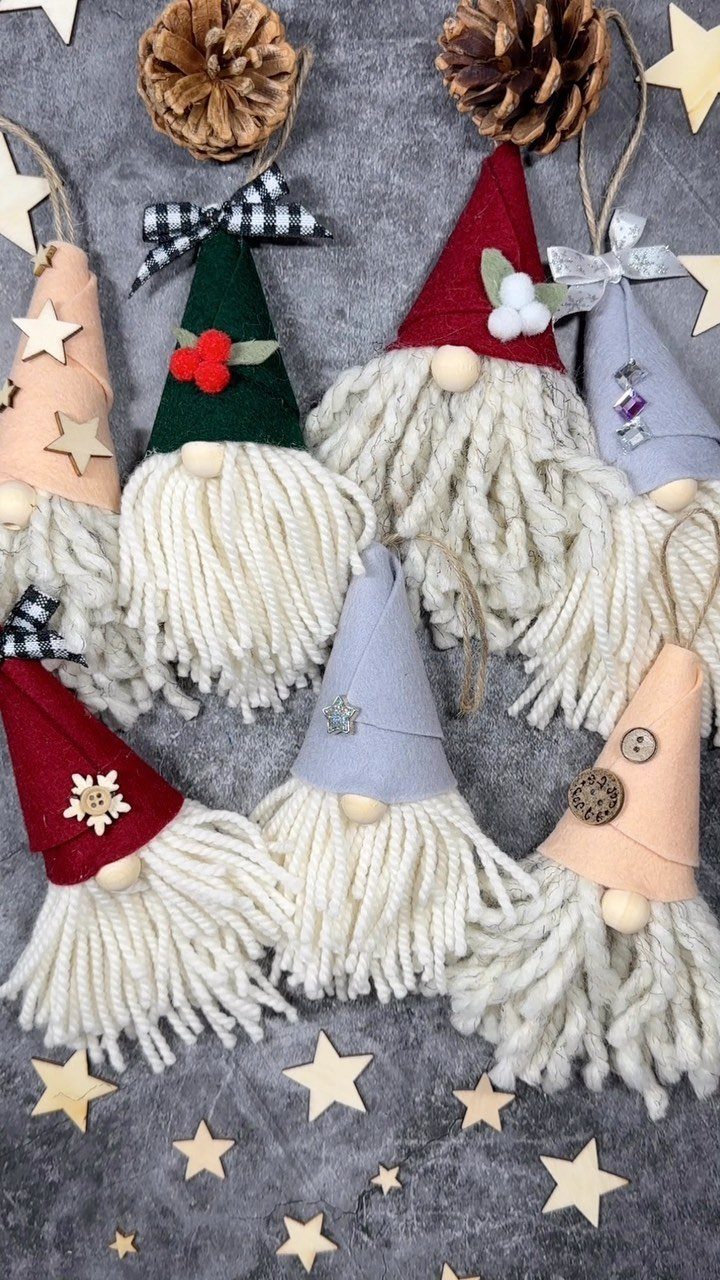
Felt gnomes come together from a hat triangle, a beard rectangle, and a wooden bead nose, all small enough to stitch by hand during a single movie.
The beard is yarn brushed out or cut fringe; both read differently under lights.
Colors are entirely open: red and green for tradition, gray and cream for something that stays out past January. Accessories help: a tiny broom, a wrapped gift, a string of lights to hold.
A palm-sized gnome means a tree can hold a dozen without crowding. My own preference is for mismatched hats, a small crowd rather than a matched set.
7. Wood Slice Ornaments
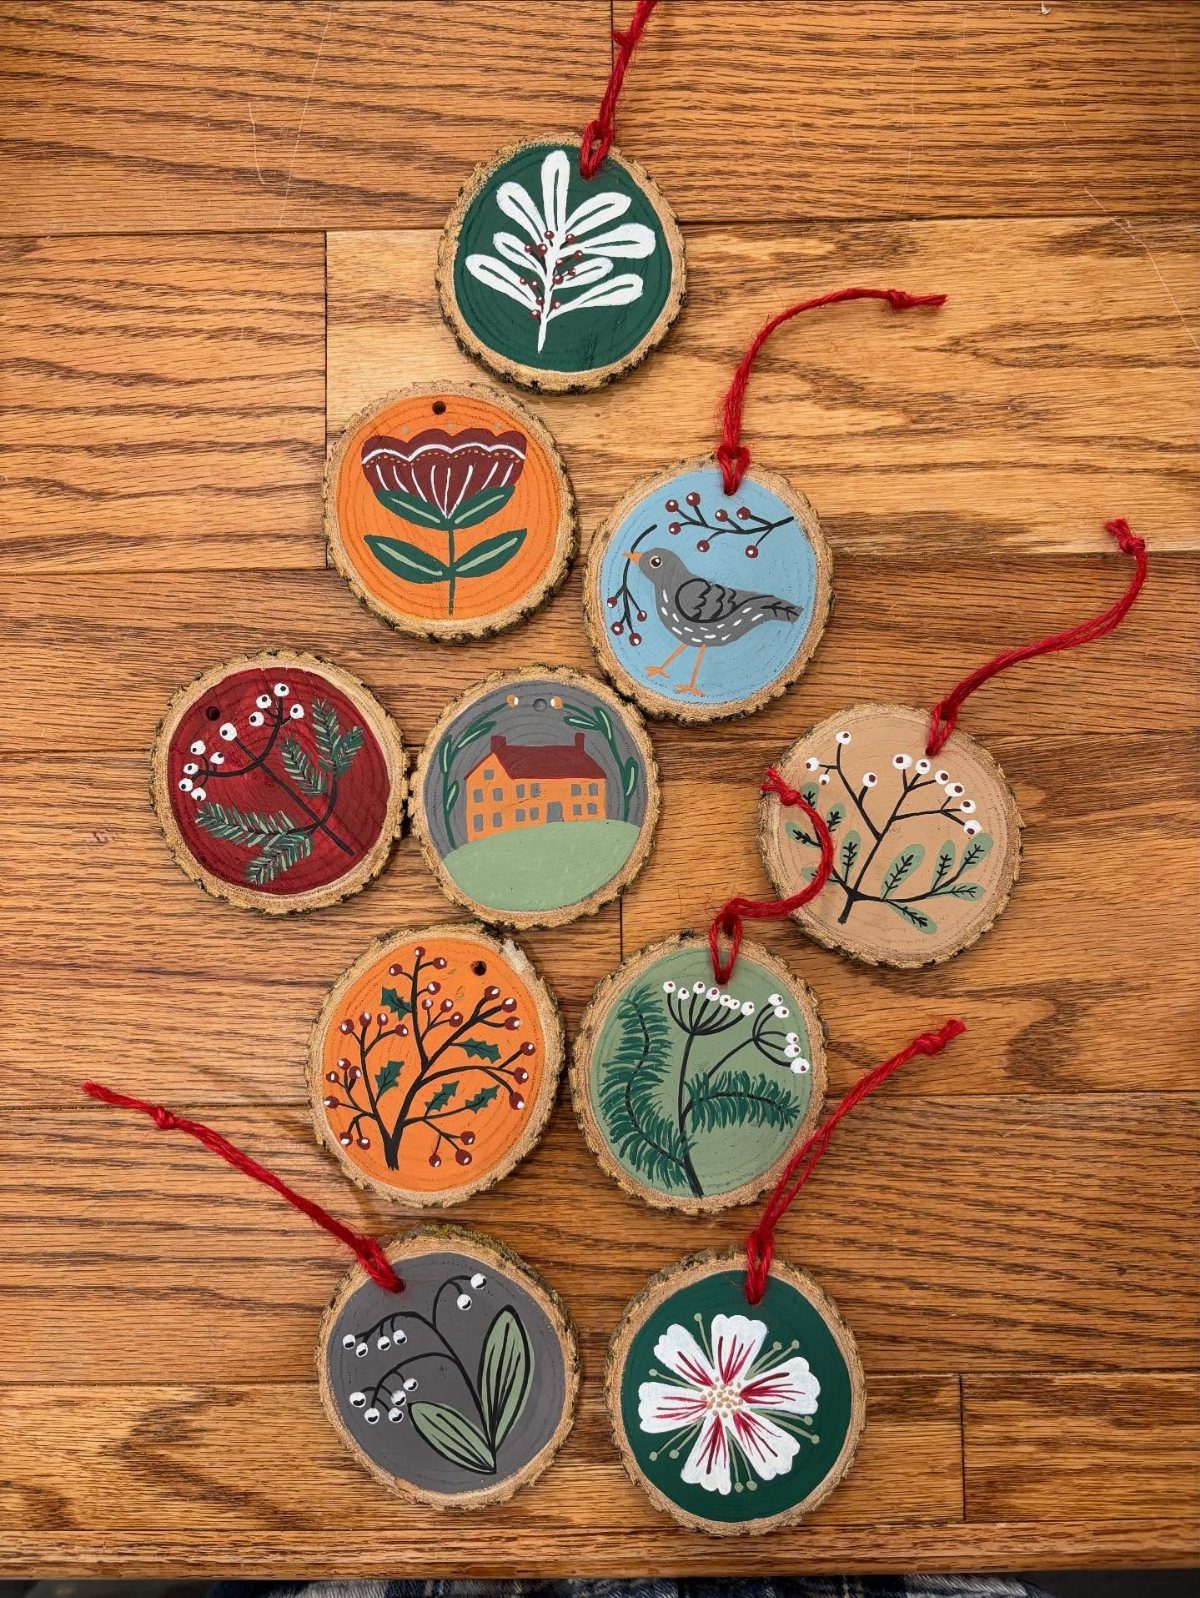
A wood slice with bark still on carries the forest into the room better than anything painted on plastic.
The surface takes craft paint or paint markers without bleeding if you seal it first with a thin coat of matte medium; the grain shows through either way.
Folk-style flowers, a small house, berries, or a bird all sit well on the round, and the natural edge frames the work like a rough mat.
A drill bit through the top, not too close to the bark, holds twine or ribbon without splitting. These are heavier than paper but lighter than ceramic; a sturdy branch takes them fine.
Embossing powder and a heat gun give a raised line that catches light differently than flat paint, if you want to push past basic decoration.
Kids can manage the painting with markers; the wood forgives drips that sand off once dry.
8. DIY Photo Ornaments
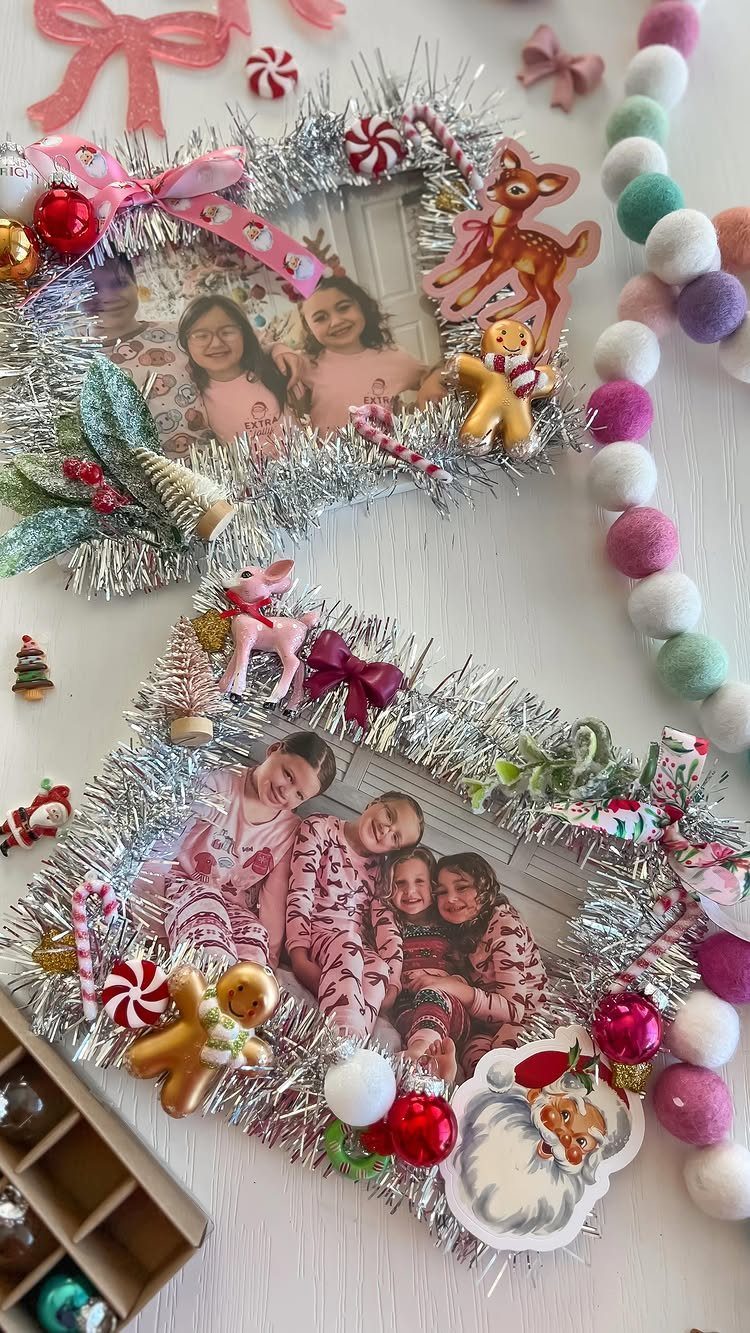
A photo inside an ornament turns a generic tree into a family timeline, year by year.
Clear glass or plastic baubles split open to take a rolled or curled print; paper weight matters more than you’d think, too heavy and it unfurls, too light and it floats crooked.
Tinsel borders and small trinkets glued to the frame or the ornament itself hide the mechanics and add color the photo may lack.
Ribbon through the cap holds the weight; wire works for heavier frames. These are slower than plain ornaments because of the printing and the fitting, but the result outlasts the season.
Silver tinsel reads vintage kitsch, which some trees want and others do not. A plain wood frame with a red ribbon suits a different room entirely.
DIY Christmas ornaments are the perfect family project and can provide some wonderful keepsakes—and memories. And, if you are conscious about reusing and recycling, many projects will help you use up items around the house.


Around 3" Tall - Unique 2D Resin Plastic Design
9. DIY Gingerbread Man Ornament
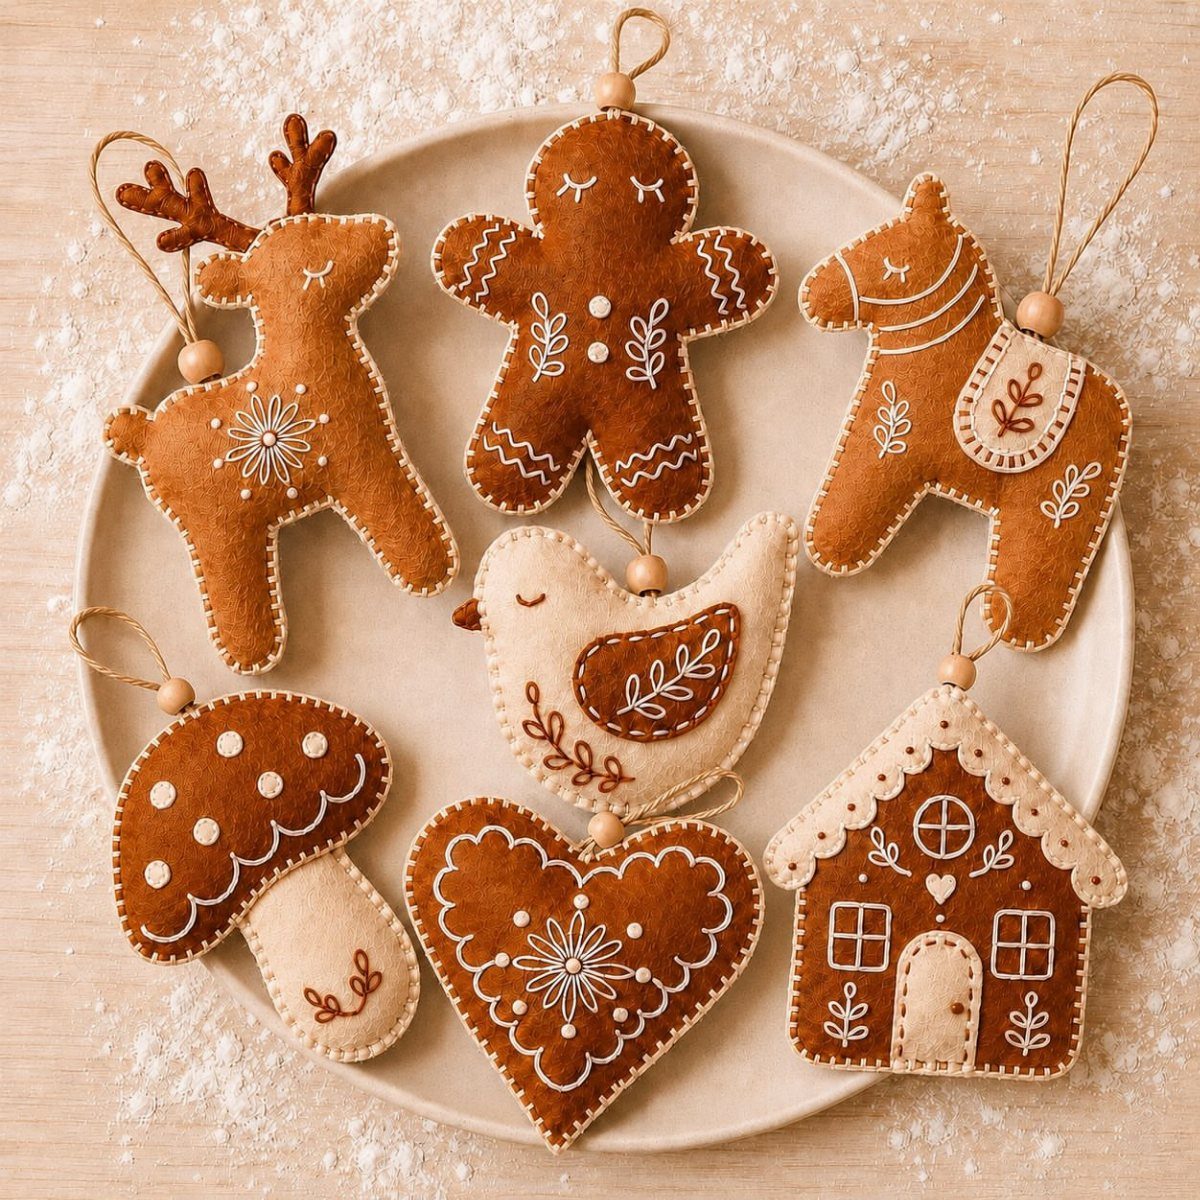
Felt gingerbread men sew up faster than they bake, and they do not crumble. A simple running stitch around the edge, right sides out, leaves a raw edge that frays slightly and looks like cookie texture.
Buttons for eyes and a mouth, small fabric scraps for icing details, and a loop of embroidery floss at the top complete the figure. The shape is forgiving; a hand-drawn template cut from cereal cardboard works fine.
Stuffing is light, just enough to give dimension without pulling the seams. These hang flat against the branch and do not spin, which matters on a crowded tree.
A dusting of white powder on the display suggests flour and sugar, though the ornament itself stays clean.
10. DIY Scented Pinecone Gnome Ornament
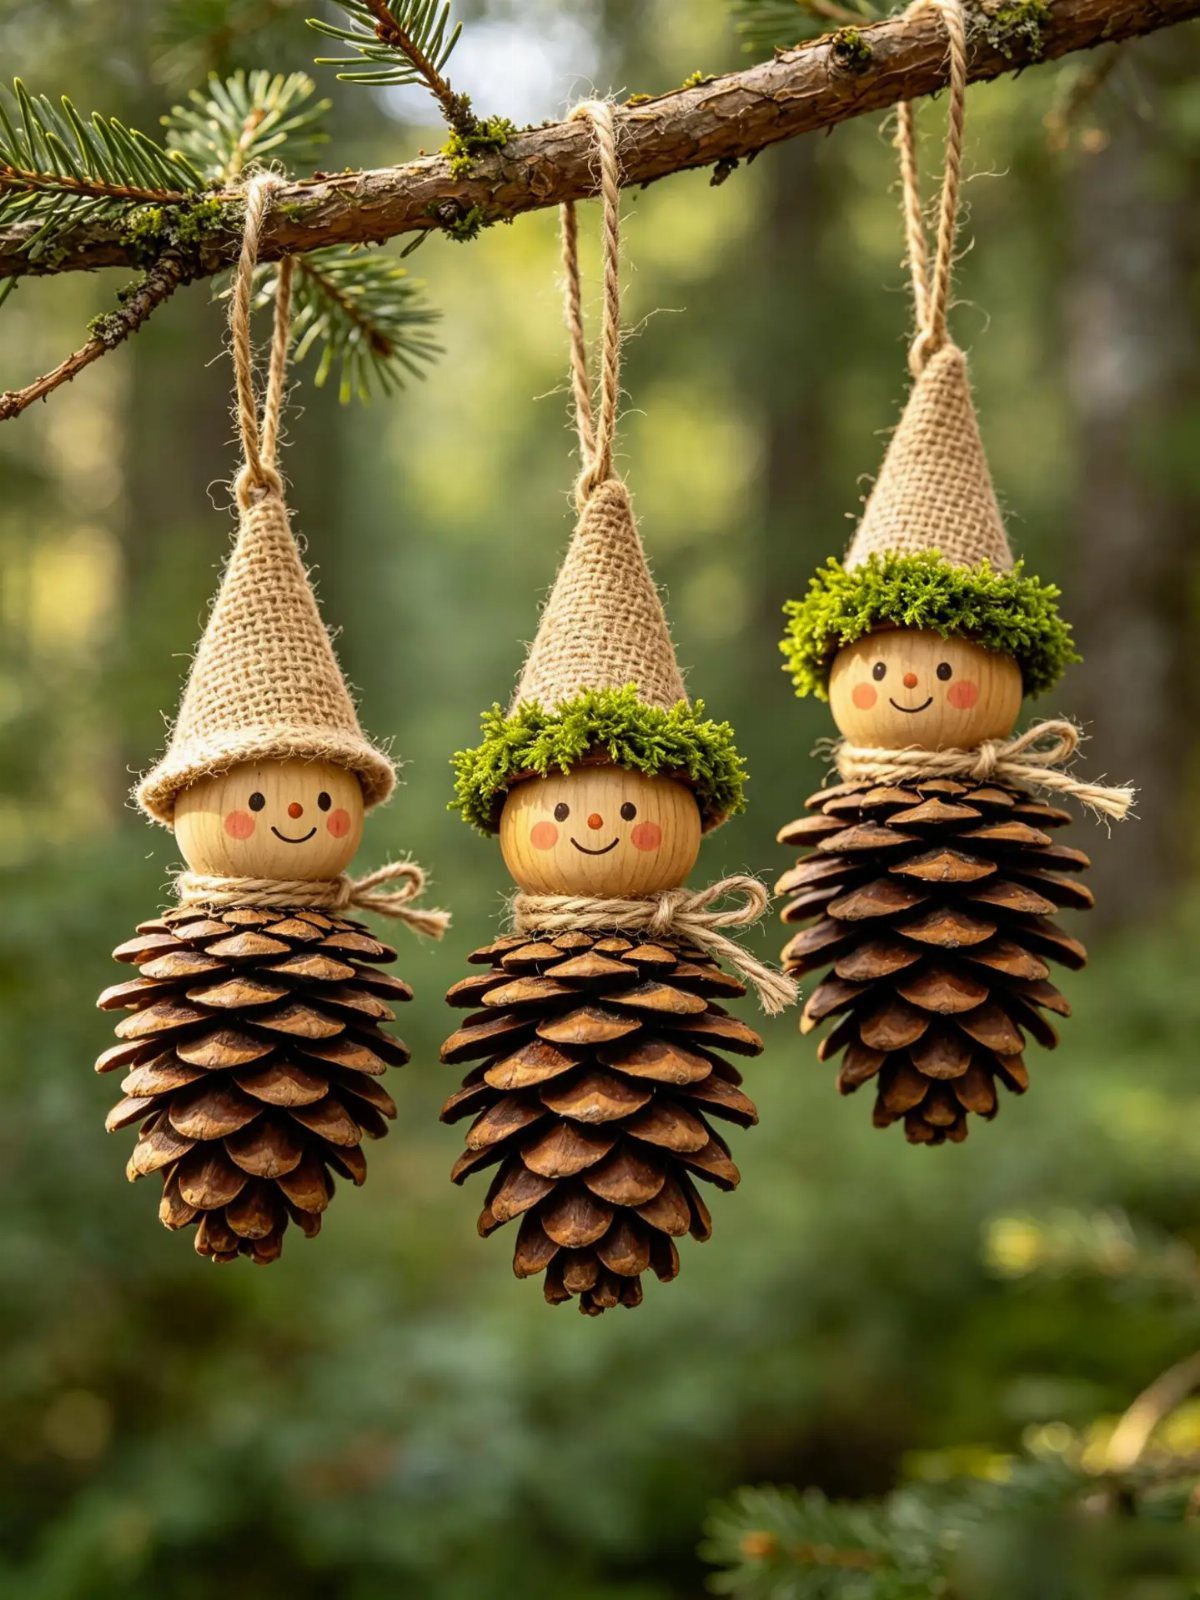
A pinecone’s natural shape suggests a body and a beard already; the craft is in the hat and face that finish the gnome.
Burlap or felt cut to a cone, glued or stitched at the seam, covers the top scales and drapes to become the profile.
A wooden bead, painted or plain, sinks into the cone’s upper opening for a nose; the pinecone points below read as beard and body without added work.
Twine through the hat peak holds the weight, which is light enough for thin branches. A drop of cinnamon oil on the cone keeps the forest smell active through the season.
These are small, palm-sized or smaller, and quick to assemble in batches. Different felt colors for the hats make a set that reads as related but not identical.
11. Popsicle Stick Santa Ornament
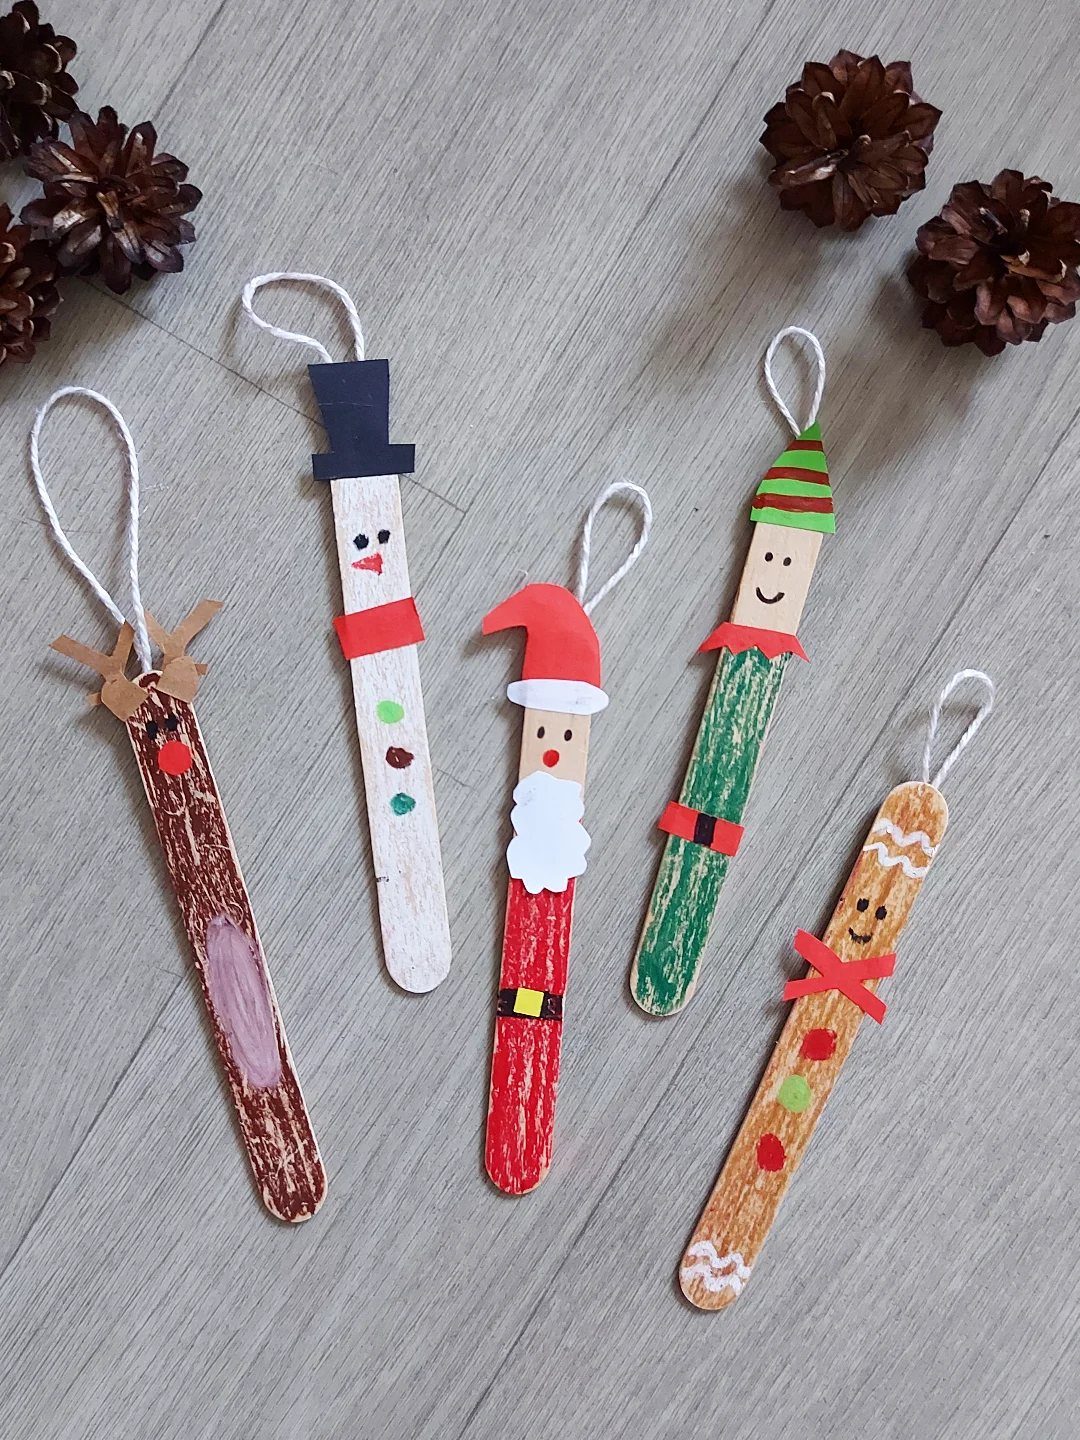
Popsicle sticks flat on a table become a ladder, a fence, or, arranged and glued into a rectangle with a brim, a Santa face with a red hat and a white beard.
The stick ends define the shape: rounded top for the hat, splayed bottom for the beard, a middle stick for the face with paint or marker details.
Reindeer, snowmen, elves, and gingerbread people follow the same logic with different colors and stick arrangements. Popsicle stick Santa ornaments are light, flat, and store in a shoebox without damage.
Painted matte reads craft; painted glossy reads school project. My own preference is matte with the wood grain still visible at the edges, a small concession to the material.
12. DIY Yarn Ball Ornament
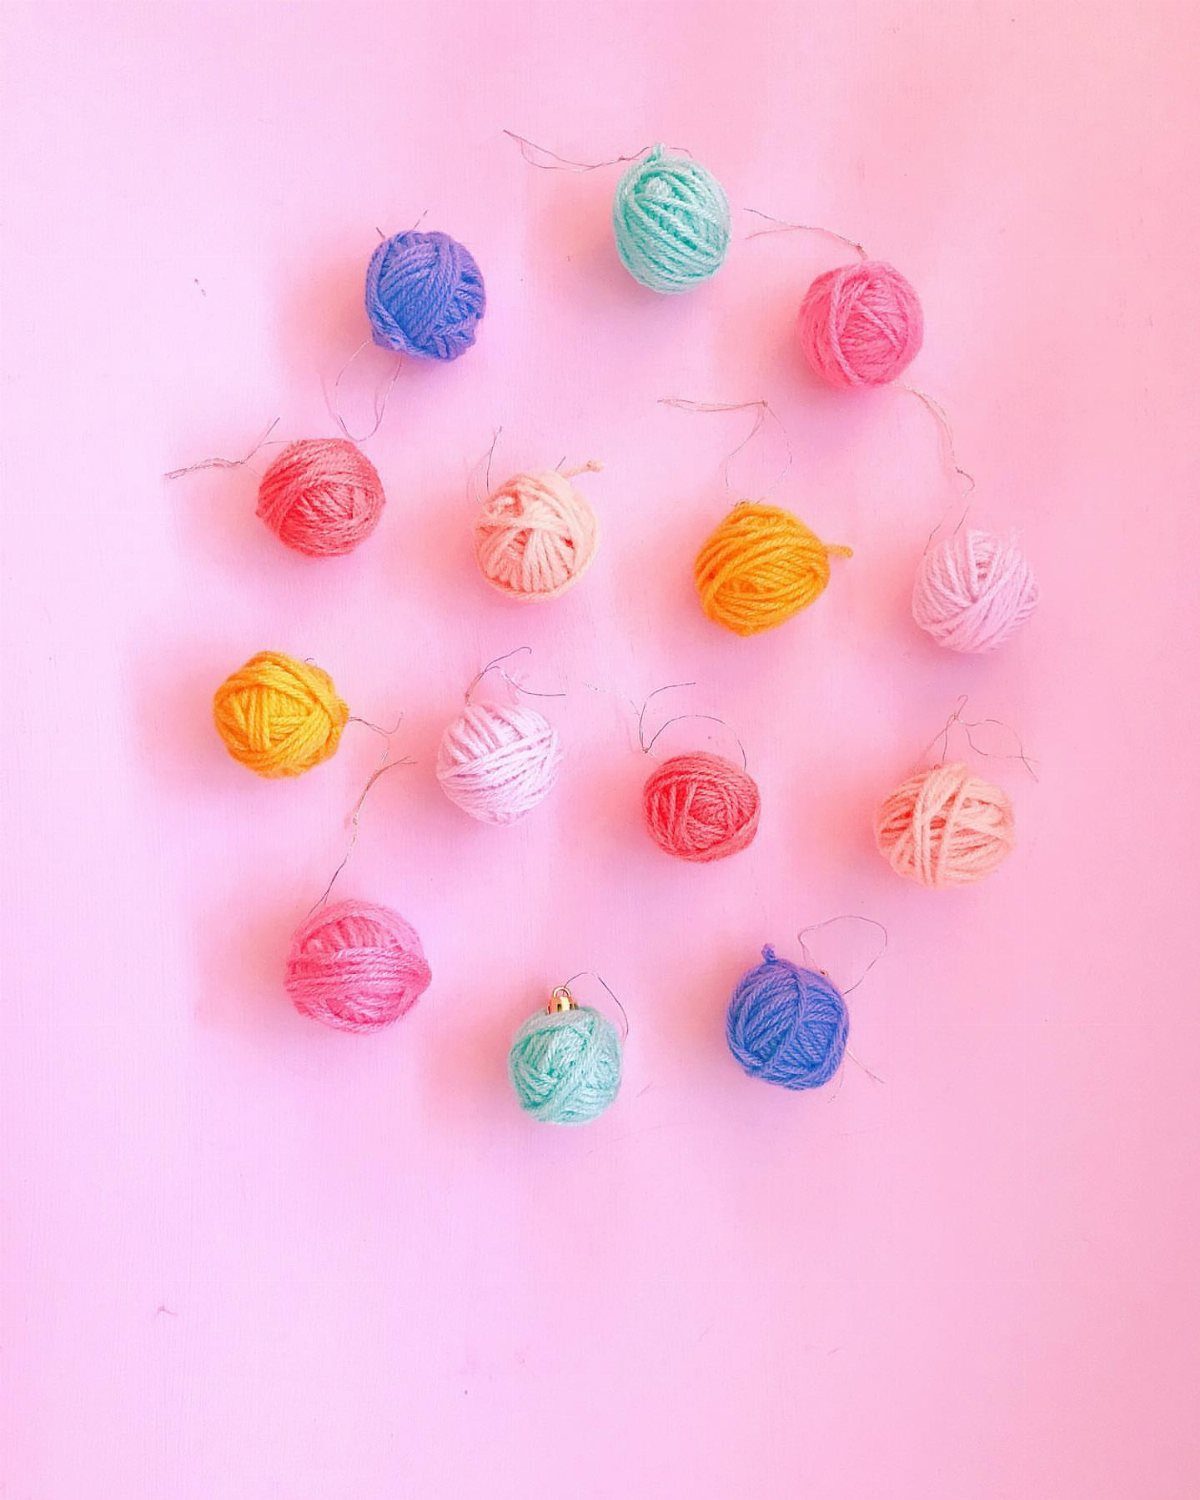
Miniature yarn balls in bright or pastel colors, wound tight and tied off, hang as ornaments that announce their maker’s craft before any gift is opened.
The winding is the work: figure-eight around two fingers, slipped off, tied around the middle, then trimmed round. Thin thread for the hanging loop matches the scale; thick ribbon overwhelms.
These are light, soft, and do not break if they fall. Color choice carries the idea: a knitter’s tree in wool tones, a crocheter’s in cotton brights, or a matched set from one project’s leftovers.
A heart shape, pinched before the final tie, is a variation that takes no extra material.
13. Quilted Christmas Ornaments
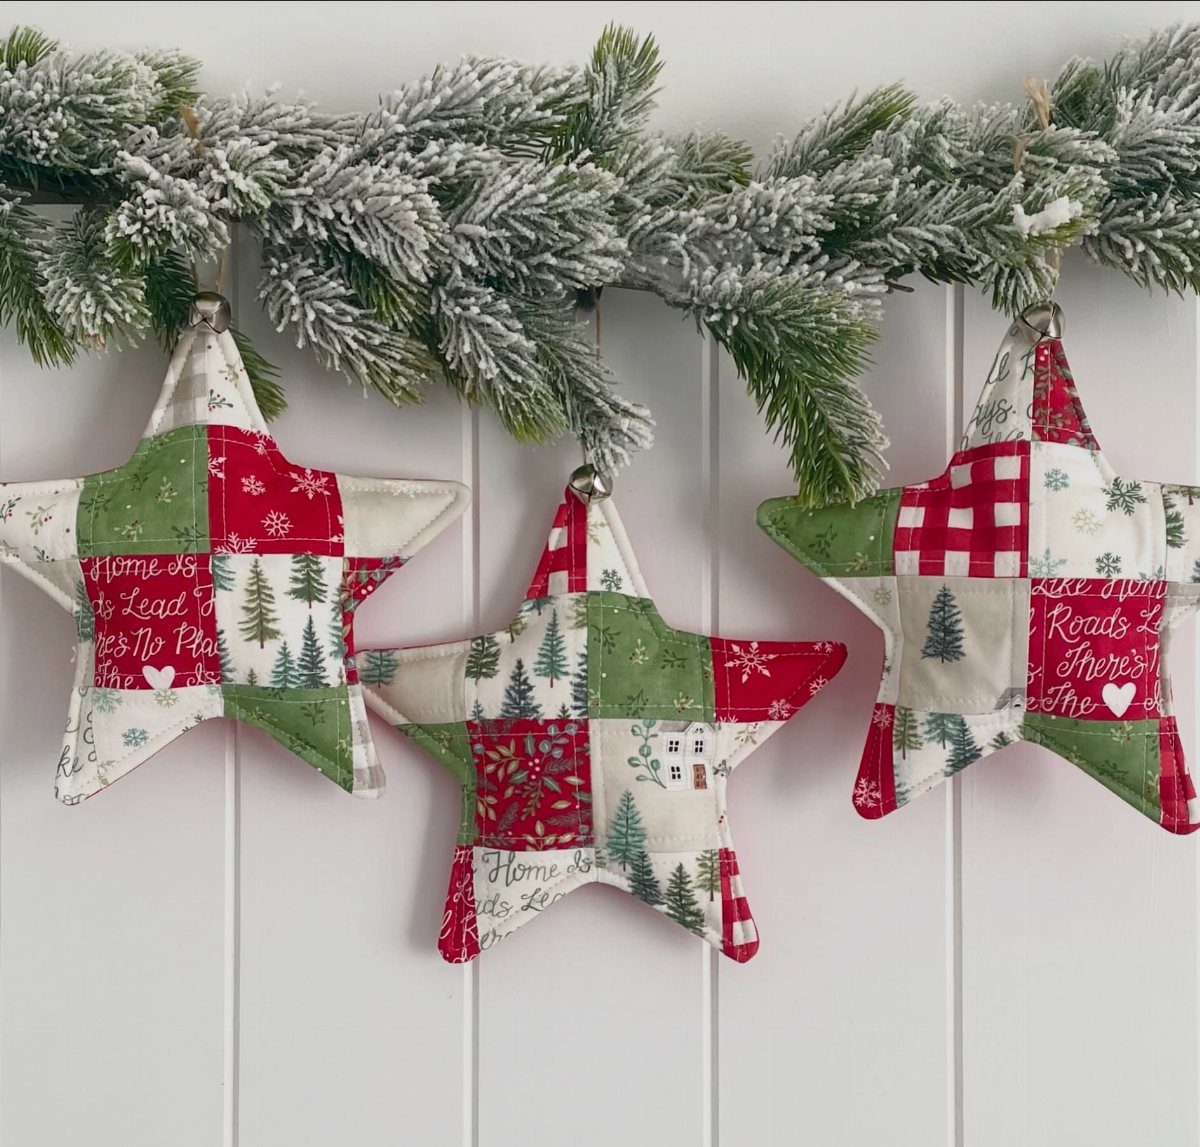
Quilted stars carry the weight of handmade history without needing a full quilt’s worth of time or fabric.
Small-scale patchwork, pressed and stitched over a stiff backing, holds its shape on the tree and reads as heirloom even when the fabrics came from last year’s clearance bin.
The visible stars use Christmas prints with text, but reproduction feedsack or plain calico would read older.
Check your seam allowance: at this scale, an eighth of an inch off multiplies across the points. A loop at one point rather than the center changes how the star hangs and spins.
14. DIY Decoupage Ornaments
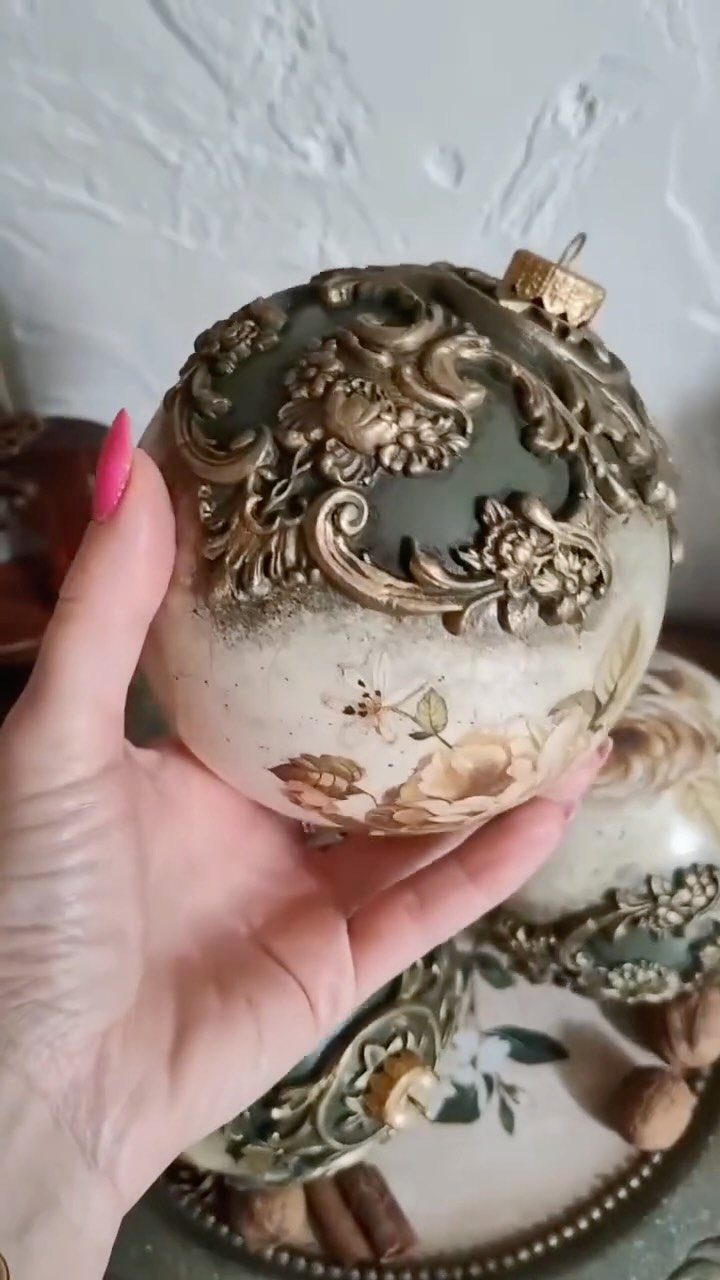
Decoupage on a glass globe starts with Mod Podge and paper thin enough to disappear into the surface. Torn edges blend better than cut; the feathered edge catches glue and settles flat where scissors leave a ridge.
The visible ornament adds sculpted relief painted gold, which is a second layer after the paper cures, not part of the decoupage itself. Old sheet music, maps, or book pages give tonal variation without fighting the tree lights.
Work over foil; the glue peels off after. A low oven, 175 degrees, speeds drying between coats if you are impatient.
15. Pom-Pom Christmas Tree Ornament
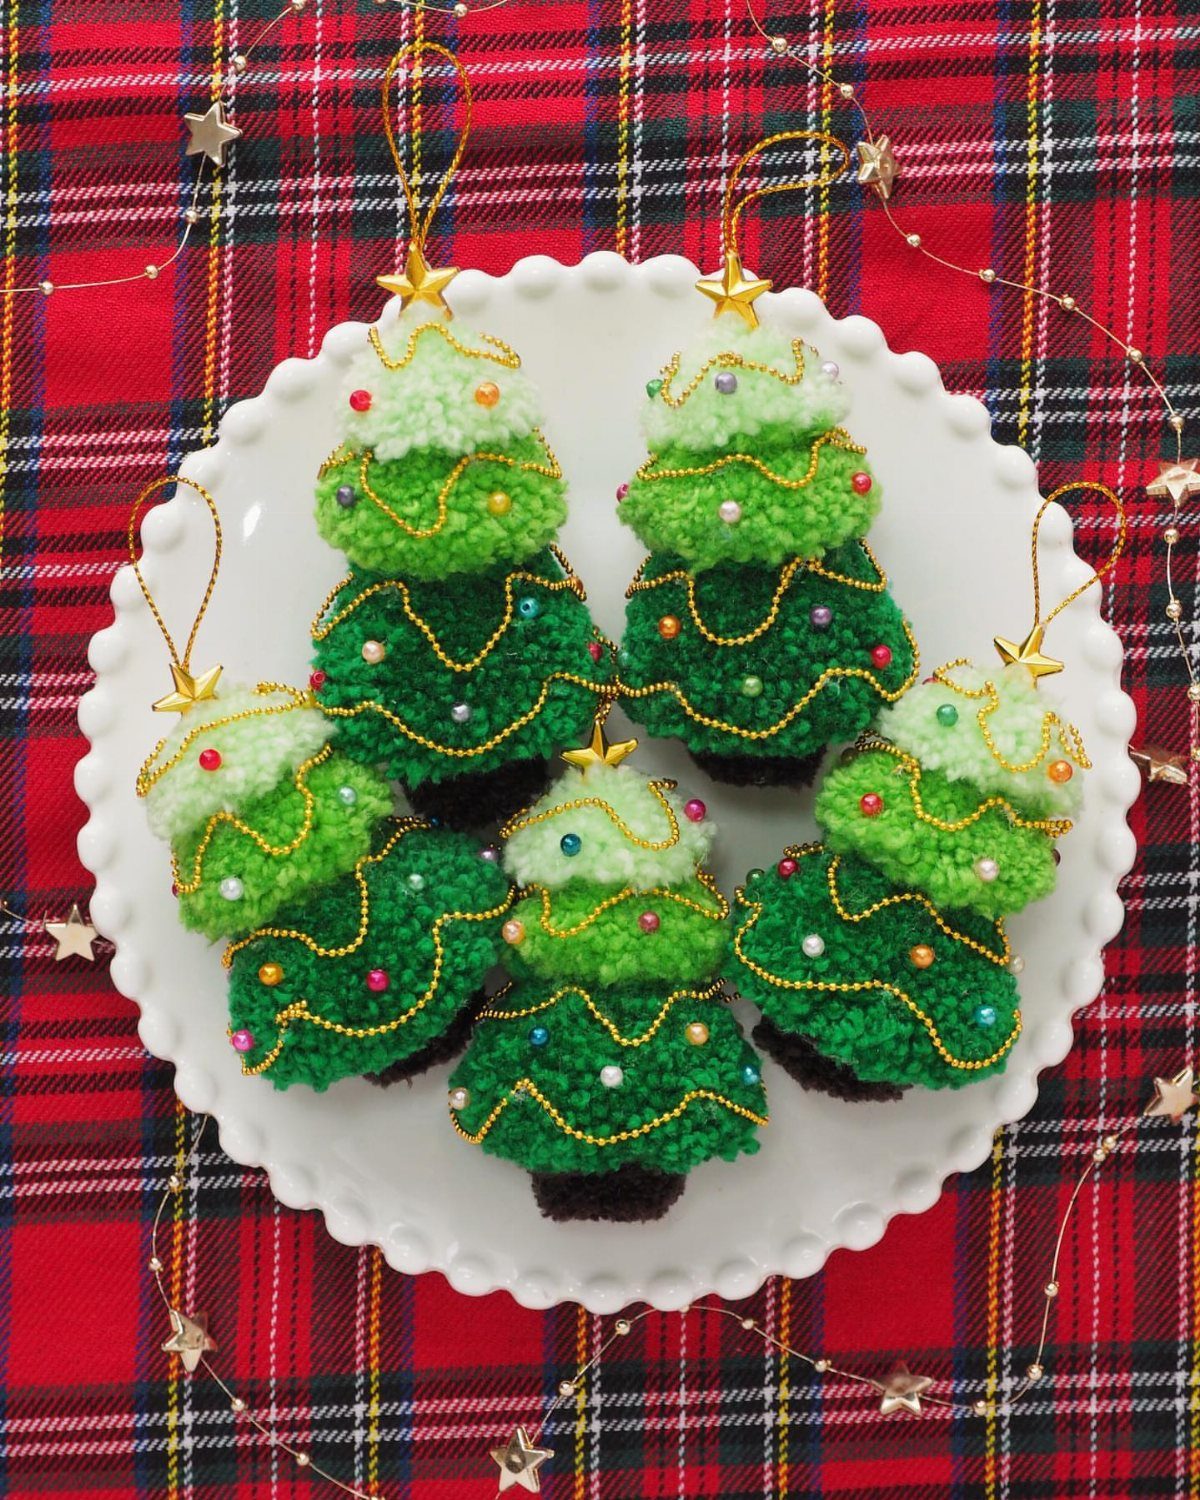
Pom-pom trees build from the base up: a central skewer or wire, pom-poms threaded and glued in place, smallest at the top.
The visible trees use green yarn with gold bead garlands wrapped around and a star finisher, which gives the shape its read as Christmas rather than abstract cone. Kids manage the pom-pom making; an adult handles the hot glue assembly.
A stiff base, cardboard or felt, keeps the bottom flat for standing or provides an anchor point for hanging. Scale matters: golf-ball pom-poms make a palm tree, walnut size fits an ornament.
16. Macrame Tree Ornament
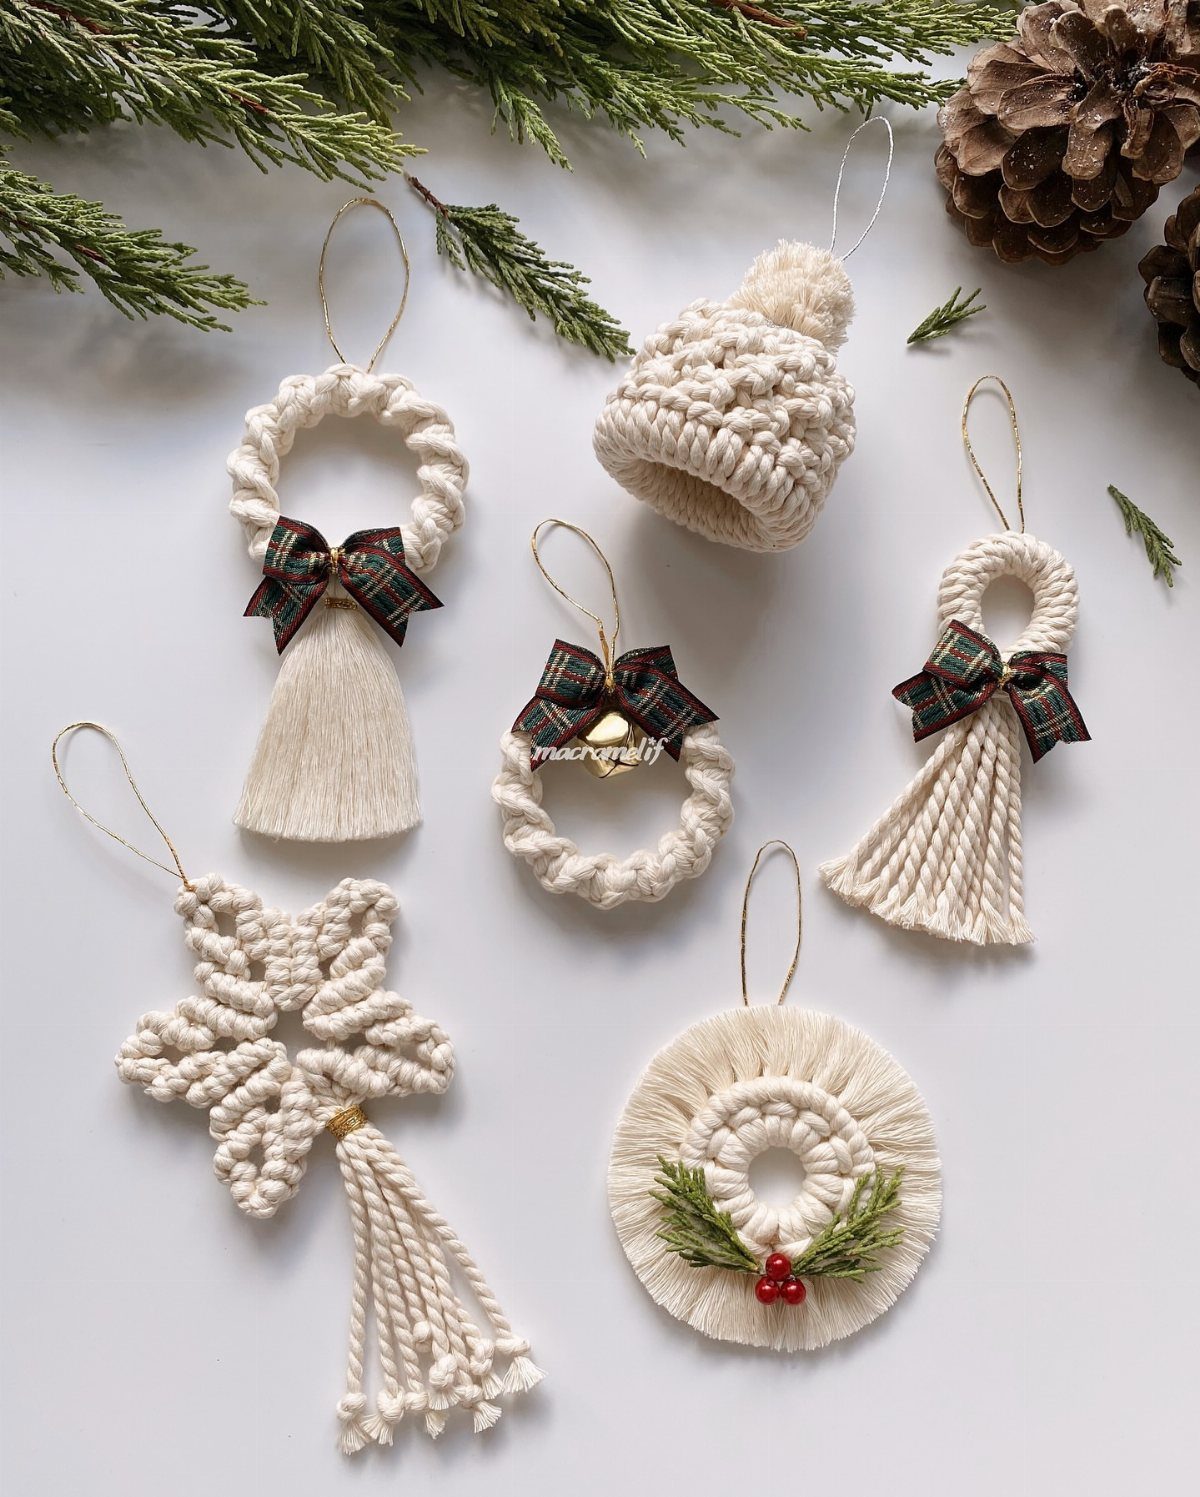
Macrame knots at this scale need only cord and patience; the visible ornaments use cream cotton in star, wreath, and hat shapes that read as set without matching exactly.
A beginner manages the Christmas tree form first, then advances to the elf variation with its added bead face and felt ears. The texture is the point: flat fabric would not catch light the same way.
Mounting matters: a loop at the top of a star hangs it point-up, which is not the same as point-out; decide before you tie the final knot. Natural cord ages to a softer tone, bright dye stays vivid.
17. DIY Paper Honeycomb Ball Ornament
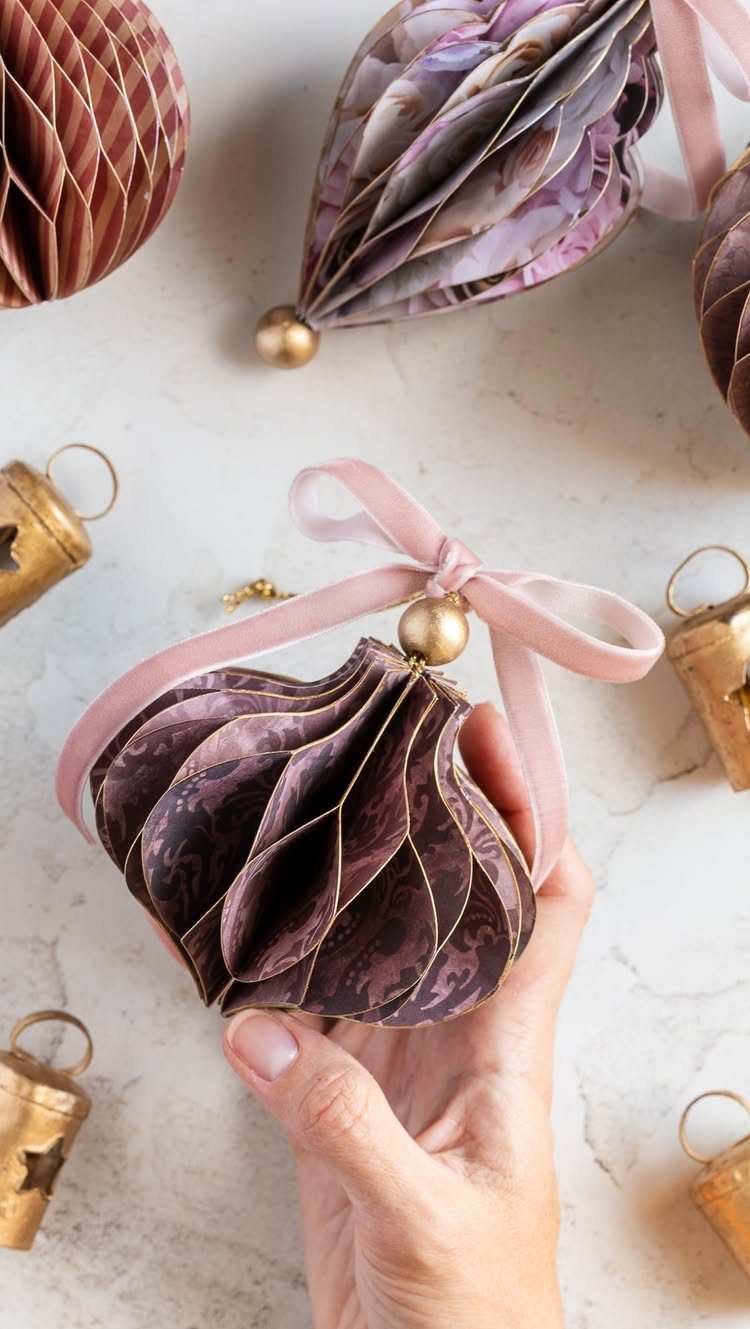
Honeycomb paper opens from flat to round with a pull, a structure built from stacked layers glued at specific points.
The visible ornament uses patterned paper in purple with a pink velvet bow, which is one way to finish the top; a plain string through the center works for a tree.
The 3D effect needs even folds and aligned glue points, otherwise the ball opens lopsided. Cardstock weight holds the shape but fights the fold; text-weight paper collapses.
A dozen layers is standard, two dozen is finer. The ball stores flat, which is practical, but the glue points weaken with repeated opening.
18. DIY Alcohol Ink Ornaments
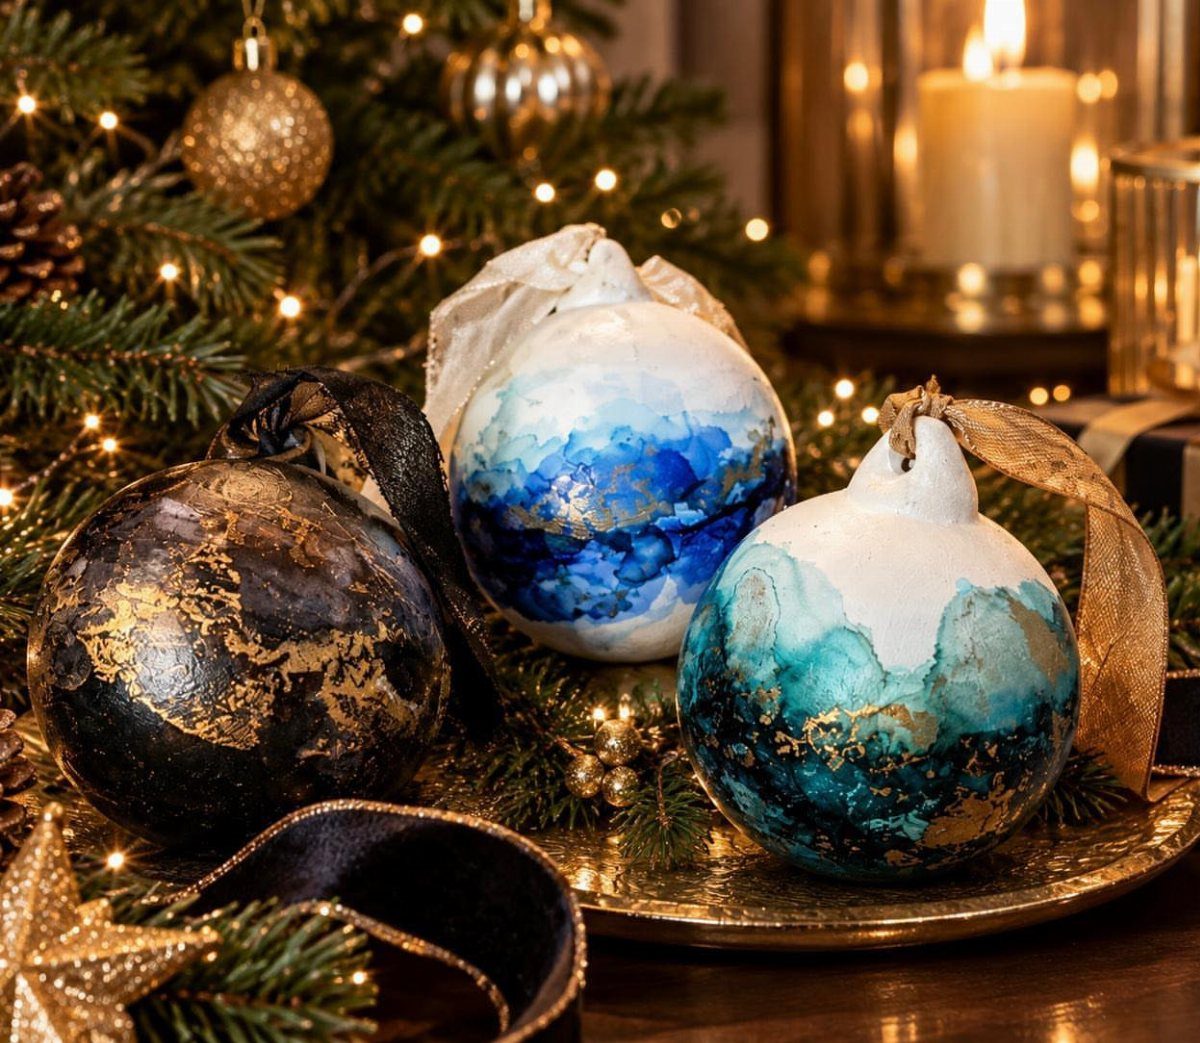
Alcohol ink on glass swims where you drop it, then dries where it lands, which is the appeal and the risk.
The visible ornaments show blue and gold marbling with metallic leaf accents, a combination that needs the ink layer fully cured before the leaf adhesive goes on.
Work on a protected surface; the ink stains permanently. A clear sealant after everything dries keeps the design from scratching off where fingers grip.
These read as adult craft, not kid project; the materials cost more than paper or dough, and the results are fragile. A set of three in related blues suits a mantel or a gift.
19. DIY Mercury Glass Ornaments
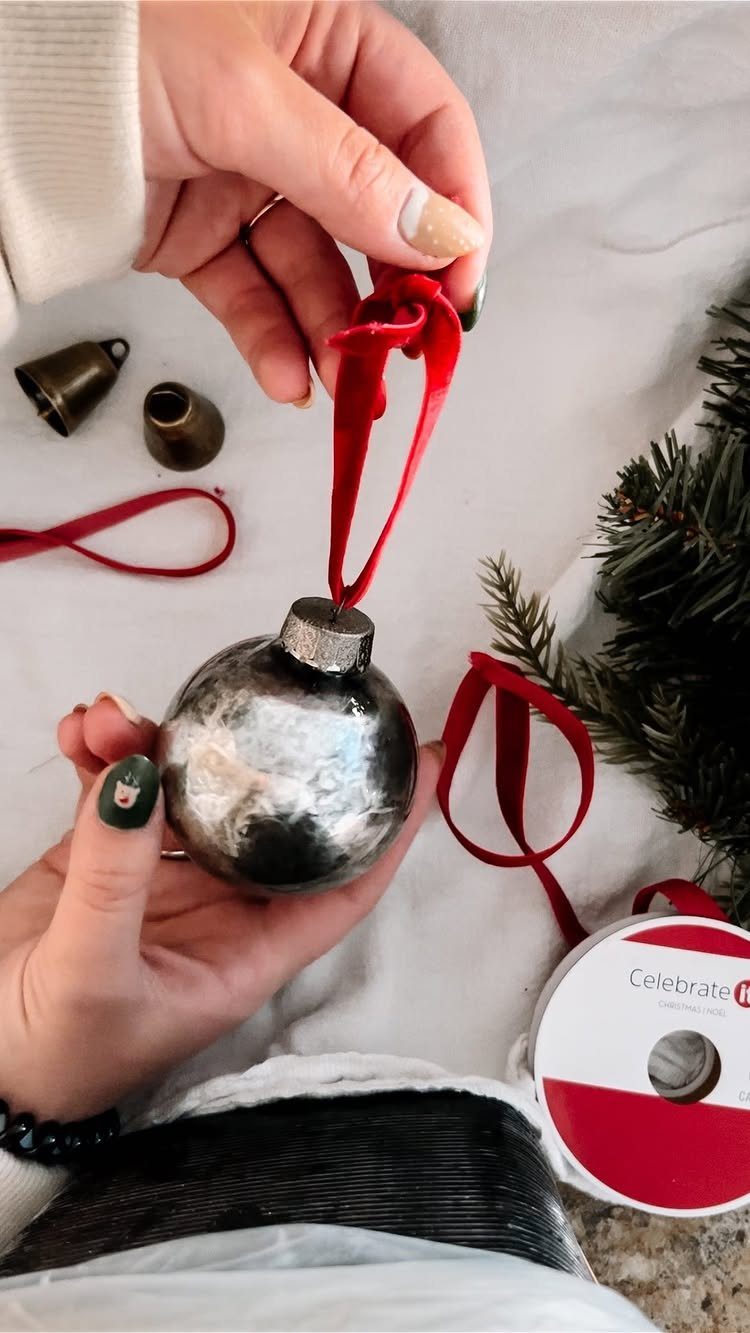
Mercury glass starts with a plain glass bauble and builds age in layers: mirror spray paint, then vinegar water flicked on before it dries, which eats the surface into spots that read as worn silver.
The mottling is the point; perfect coverage looks like chrome, not history. A red velvet ribbon at the cap, as the visible ornament shows, gives the only color against the gray.
Work outside or with a window open; the propellants are harsh and the finish needs rotation while wet. Two light coats beat one heavy one for even spotting.
20. Wine Cork Reindeer Ornaments
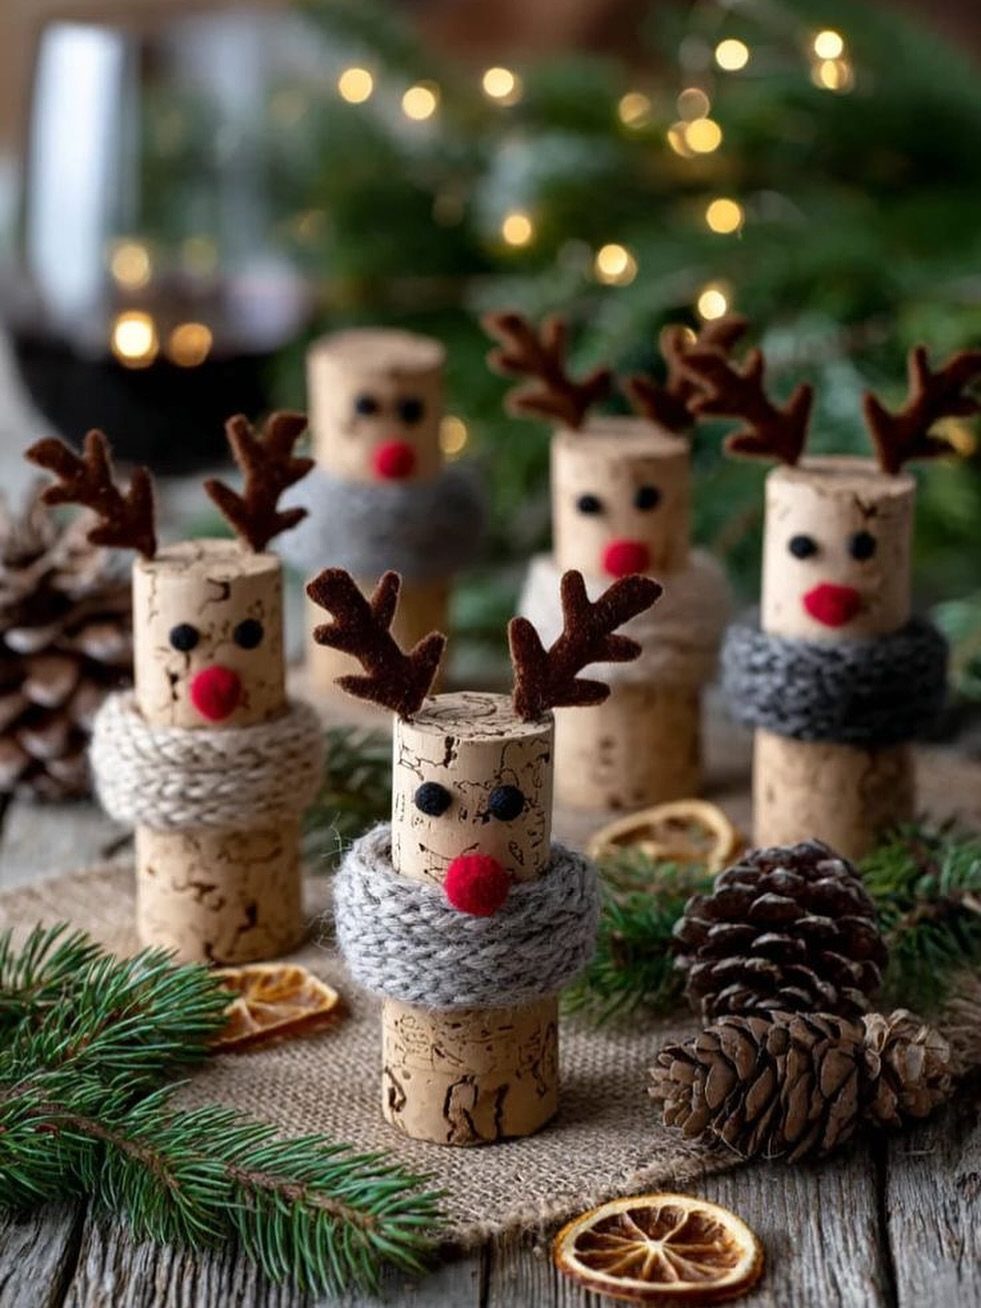
3 corks stacked and glued make a reindeer body with natural texture already in place; the variation is in the head angle and leg position, which changes the read from standing to leaping.
Felt antlers, a red pom-pom nose, and a yarn scarf complete the figure, all small enough to glue with craft adhesive.
The cork grain suggests fur without paint, though a wash of brown evens the tone if your corks came from different bottles.
Kids manage the gluing and decorating; an adult handles the initial stack and clamping while the adhesive sets.
21. Birdseed Christmas Ornaments
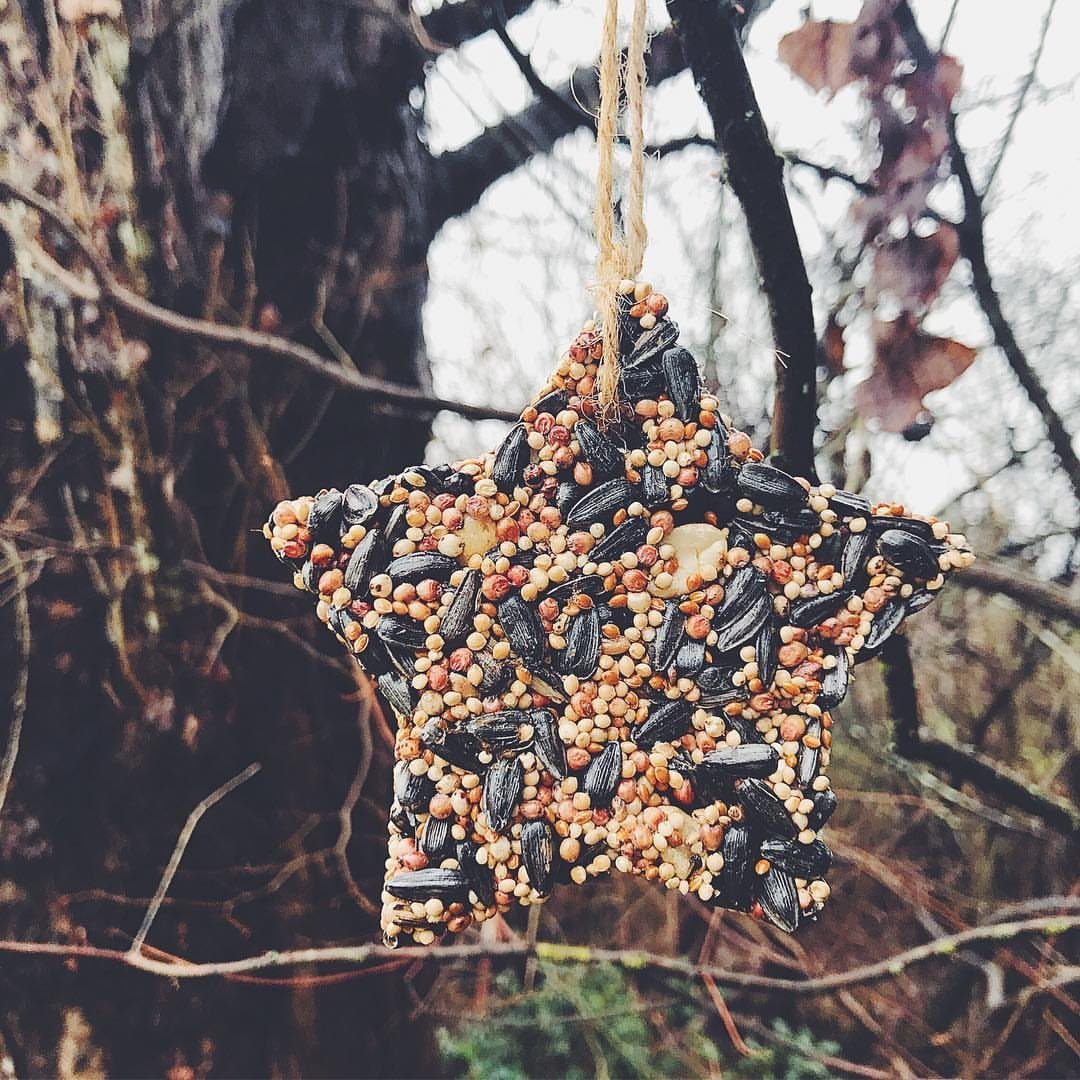
Birdseed ornaments hang outside and stay there: the birds finish them, and nothing comes back to storage.
The mix is gelatin, corn syrup, and flour bound with seed, pressed into cookie cutters on wax paper, with a straw through for the twine hole before they set.
A firm press and a level drying surface keep the points from sagging while the gelatin sets.
Twine rather than ribbon holds up to weather and squirrel teeth. These suit a yard tree or a porch branch visible from the window; inside they shed and attract pests.
The batch takes an afternoon to mix, mold, and dry; unmold gently or the edges crumble.
22. Beaded Snowflake Ornaments
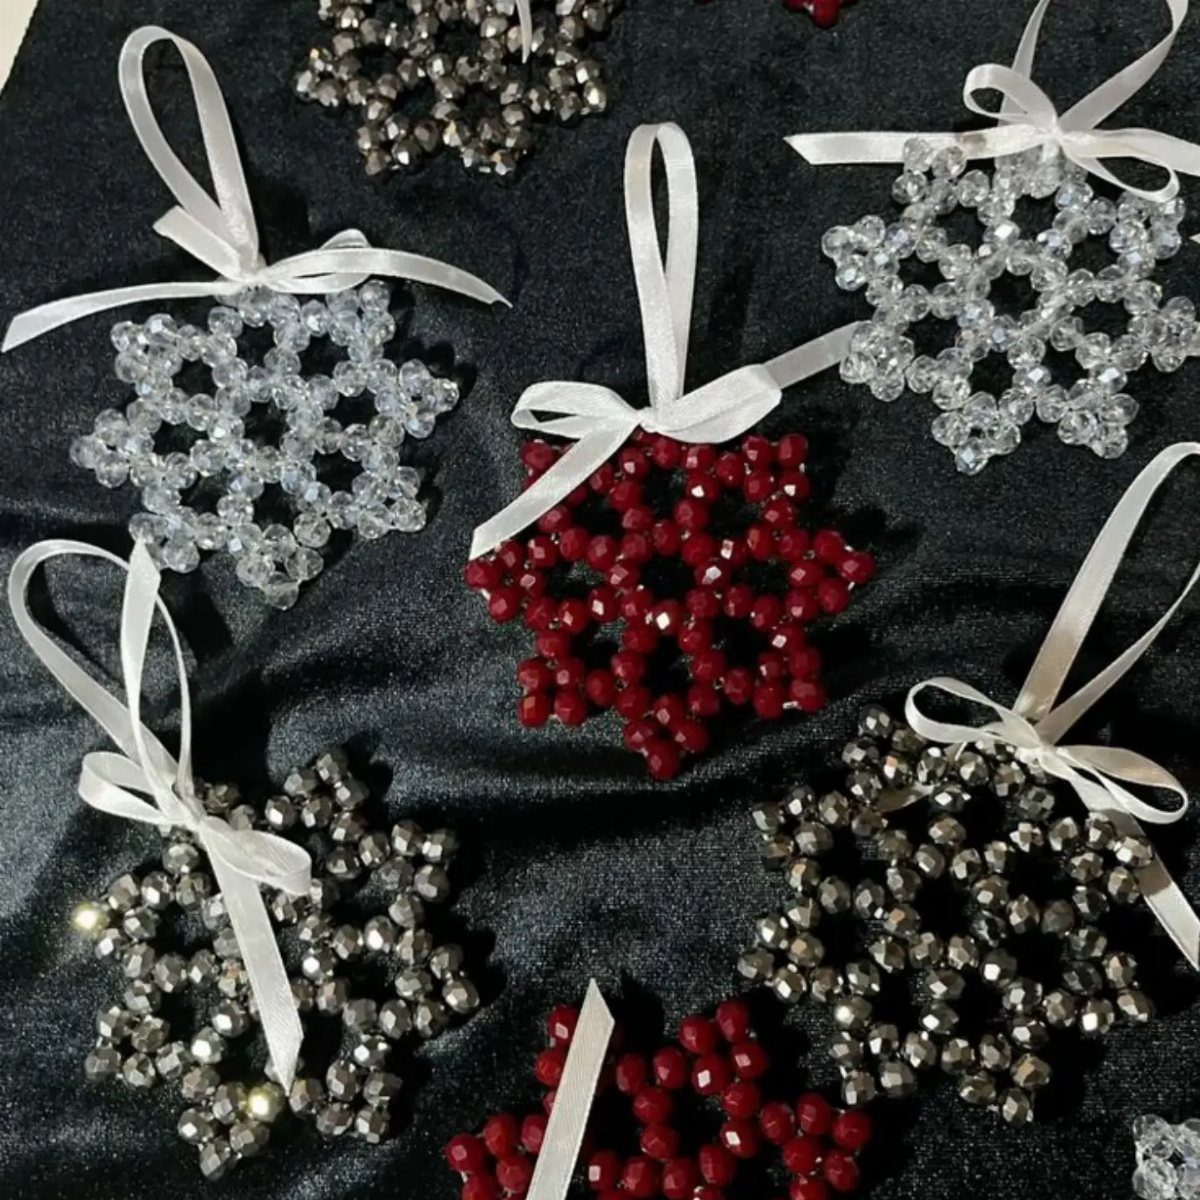
Faceted beads catch tree lights differently than round ones; the flat surfaces throw small bright points around the room.
Wire forms the snowflake arms, with beads threaded and crimped at each point, and a white ribbon loop at the top for hanging.
The visible ornaments use clear, red, and silver together, which reads as traditional; a single color in all white or all blue would suit a different tree entirely.
Pliers matter more than glue here; the wire ends turn under to hold beads without bulk. These are fragile in storage, best laid flat in a box rather than tossed in a bag.
Finer wire and more patience turn a six-point star into something more intricate.
23. Popsicle Stick House Ornaments
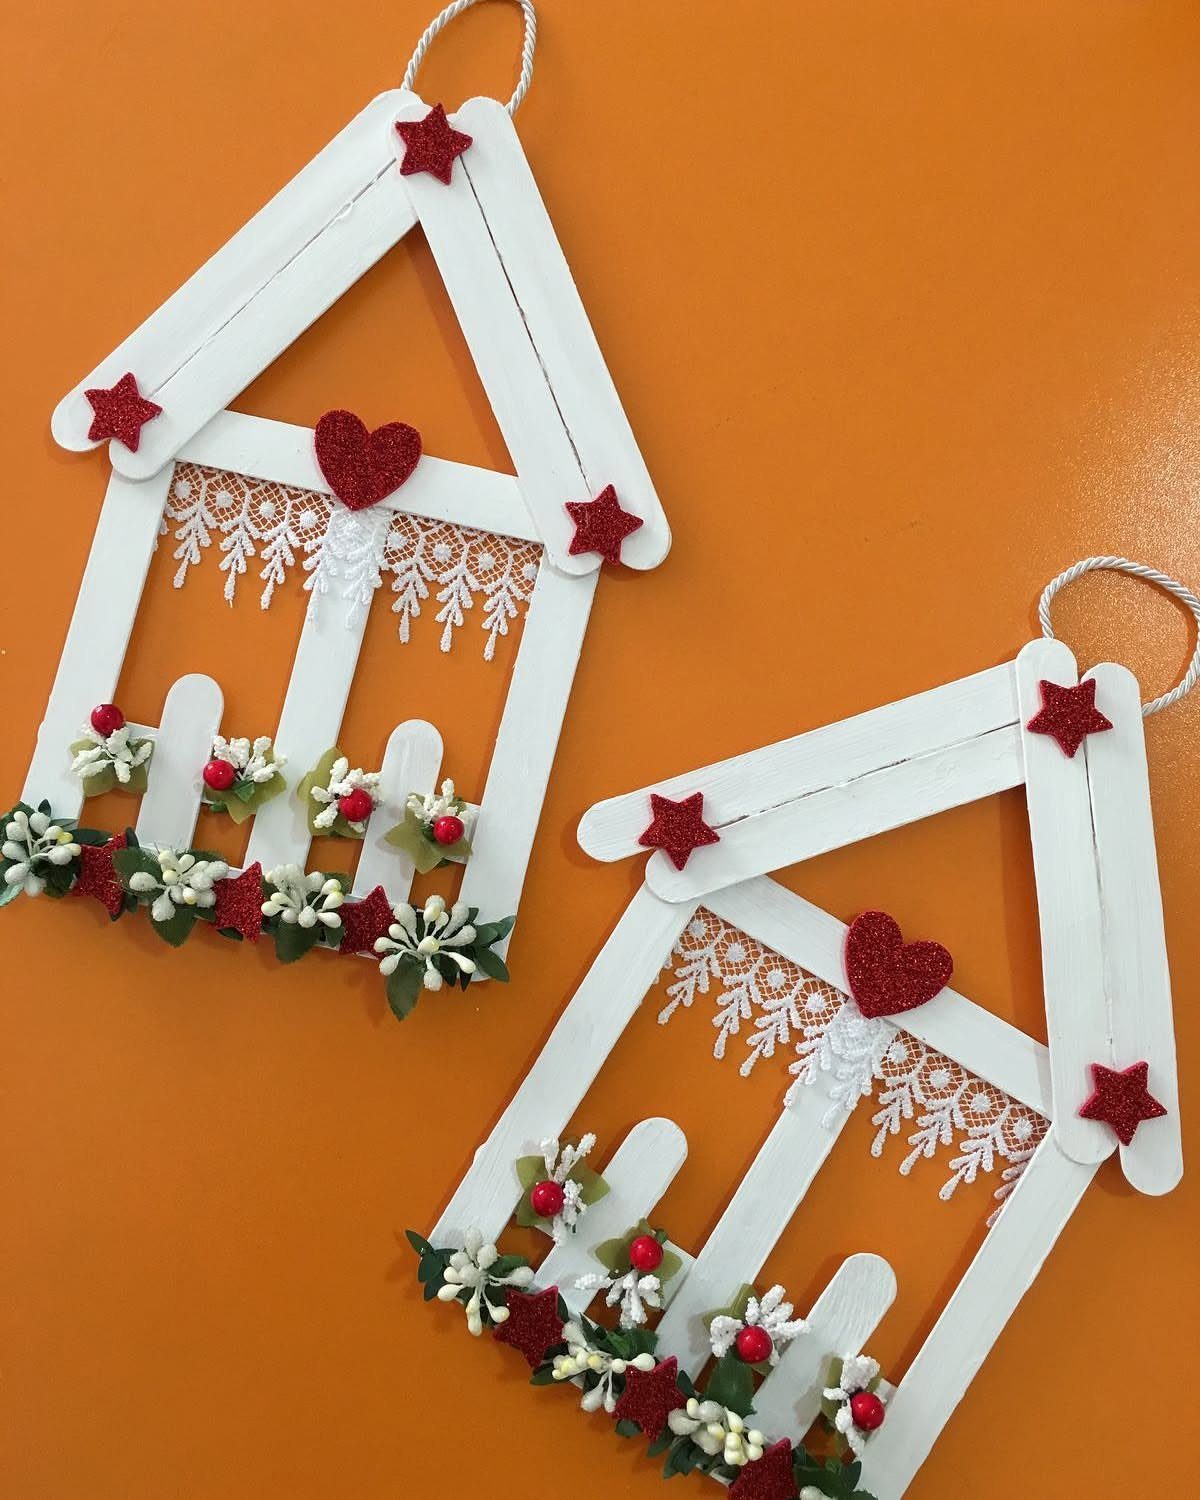
Popsicle stick houses frame empty space rather than filling it, which makes them light and lets the wall behind show through. White paint unifies the sticks; lace trim, red glitter stars, and tiny floral clusters add the detail.
The visible houses use 2 triangles for a roofline and a rectangle below, glued at the corners and reinforced with a cross stick. Lace along the eave edge softens the craft-stick line; without it the read is camp, not cottage.
White walls and an orange background make every detail pop; on a green tree the red stars carry more of the visual weight.
24. Crochet Christmas Tree Ornament
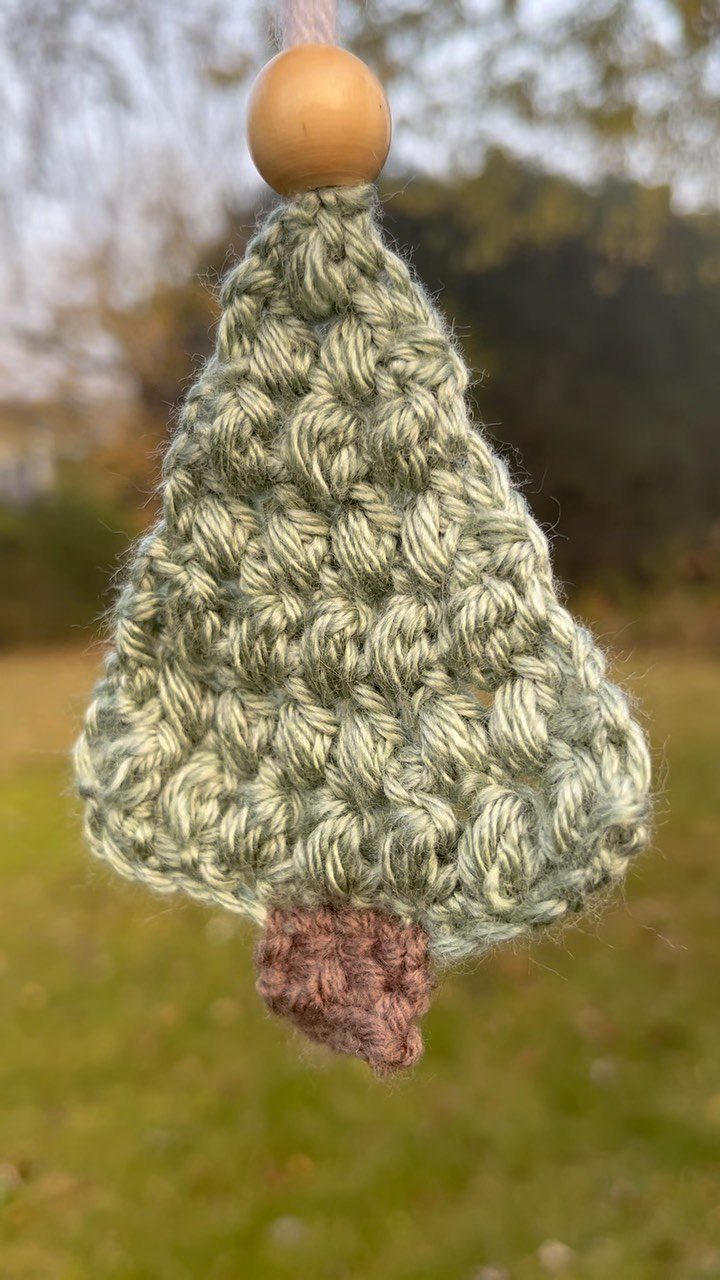
A crocheted tree in sage green with a wooden bead at the top reads as handmade without shouting; the texture is the decoration.
The shape is simple increases and decreases worked in rounds, stuffed lightly to hold the form, with the bead threaded onto the hanging loop before finishing.
Cotton yarn gives crisp stitches that keep their shape; wool fuzzes and softens the edges. The visible ornament hangs against green, where the sage blends and the brown bead stands out; on a silver tree the contrast would reverse.
This is single-evening work for someone who crochets; a beginner needs a pattern and patience for the shaping.
25. Quilled Paper Bird Ornaments
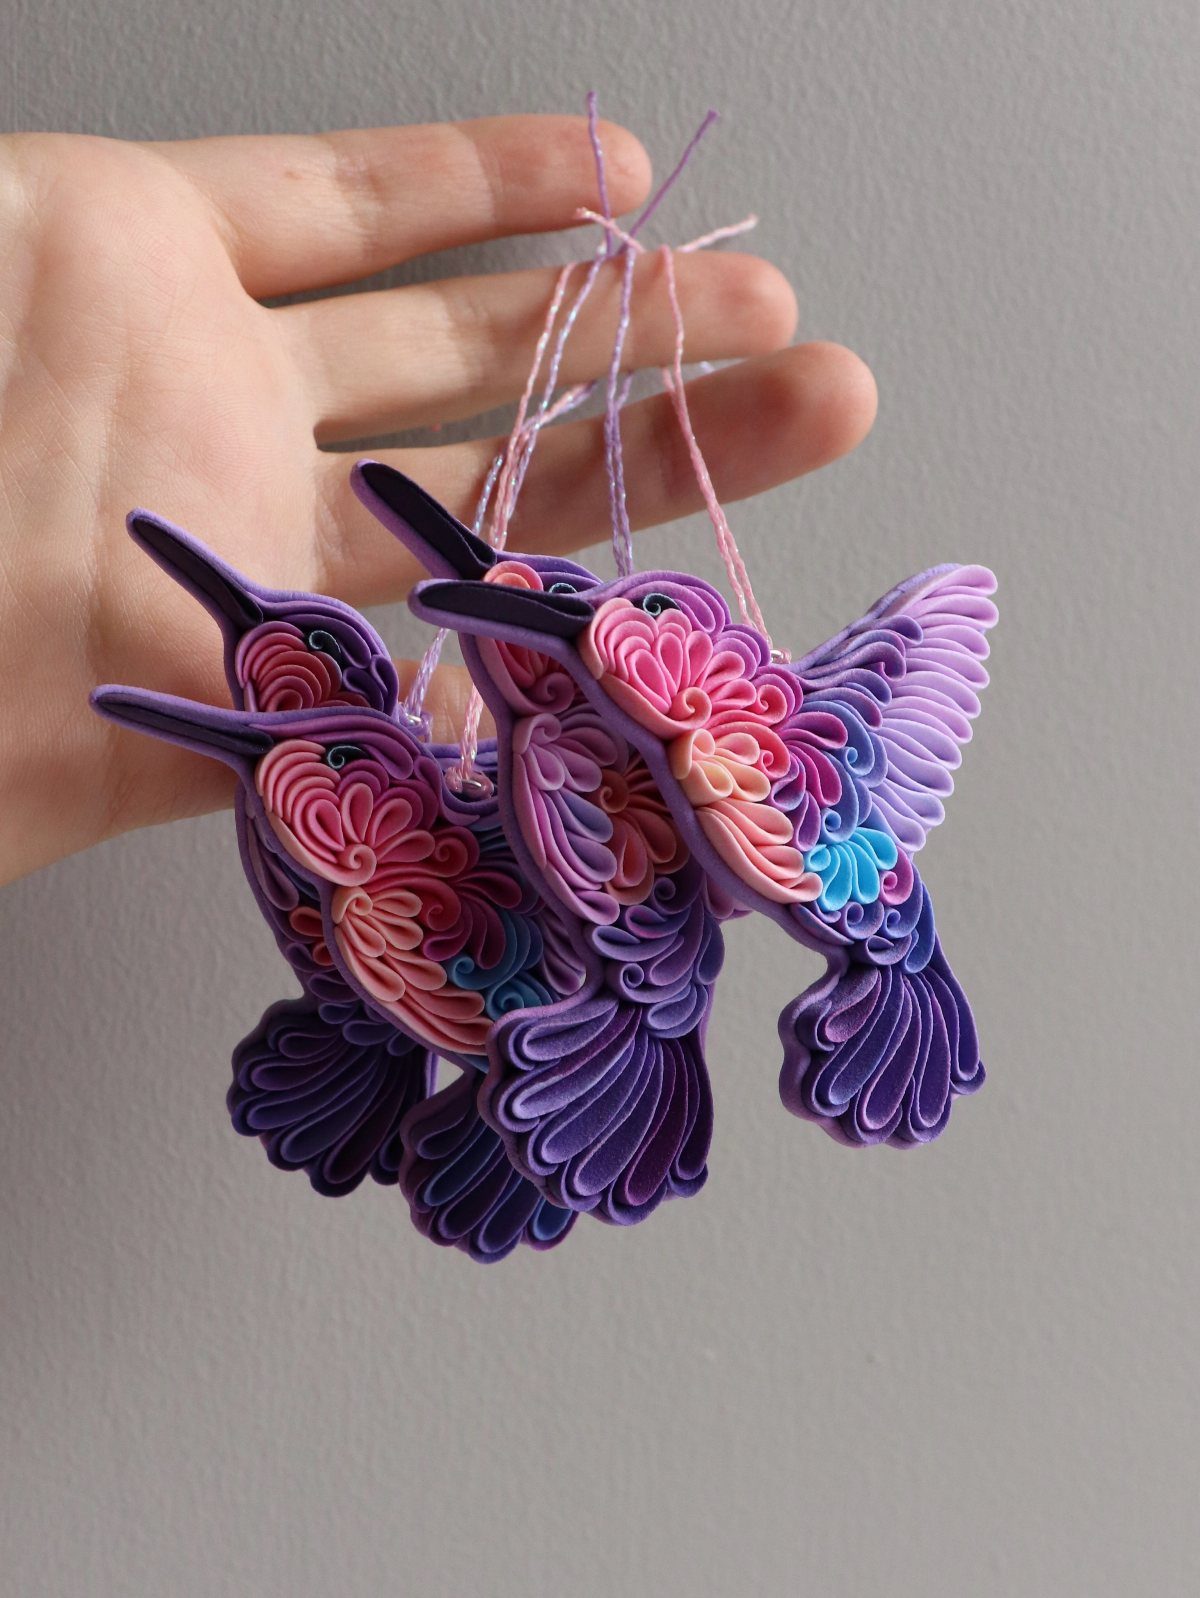
Quilled paper strips, curled tight around a needle tool and glued into loops, build hummingbirds from the inside out: tight coils for the body, teardrop shapes for the wings, a slender curve for the beak.
The visible birds use bright greens, ruby reds, and sapphire blues that read as tropical against a neutral wall.
Paper weight matters; too heavy and the coils spring open, too light and the shape collapses. A drop of glue at each join, held until set, keeps the work intact through hanging and storage.
This is patient work, not fast work; 3 birds is an evening. A single bird as a gift tag, with the loop tied to ribbon, uses the same skill on a smaller scale.
26. Pinecone and Cedar Sprig Ornament
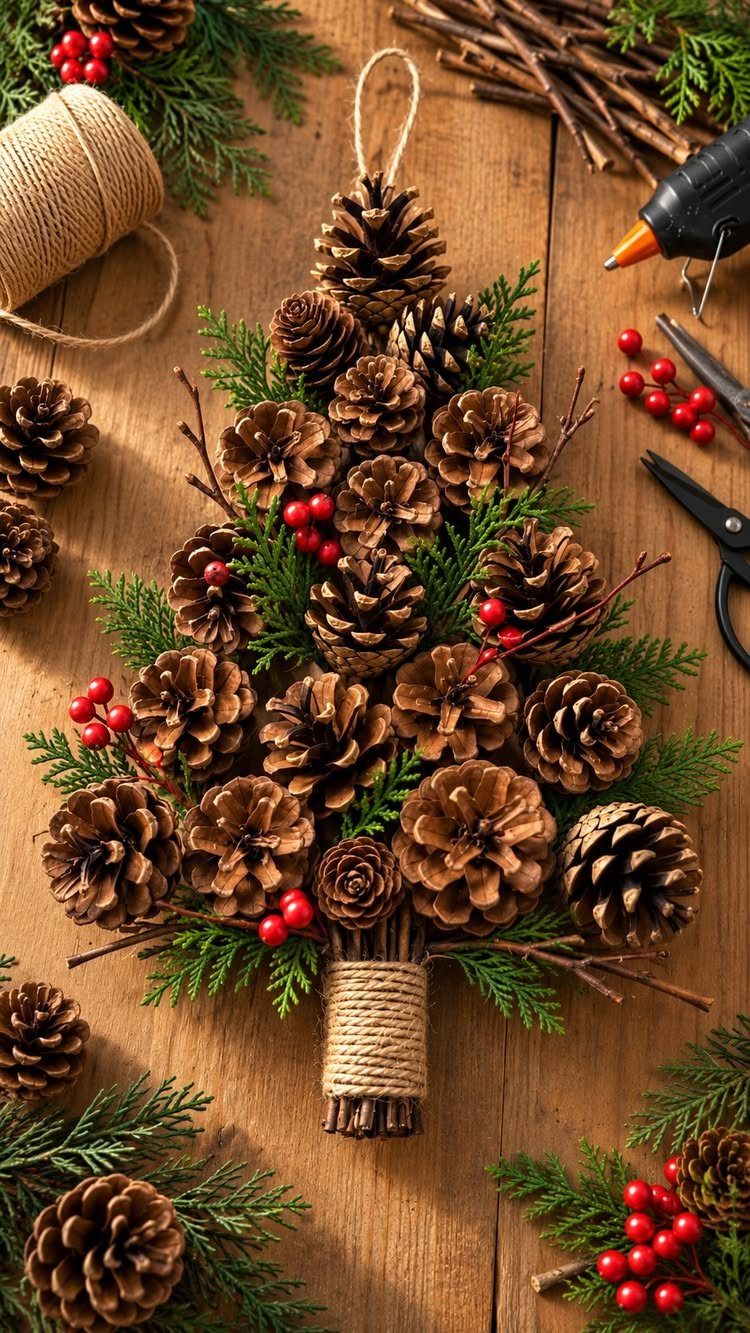
Pinecones stacked large to small and glued at their bases make a tree shape that needs no further structure; cedar sprigs and red berries fill the gaps between scales and soften the silhouette.
The visible ornament uses twine for hanging and binding both, which keeps the rustic read consistent. Hot glue sets fast but stays visible if it oozes; tacky craft glue dries slower and cleaner.
The maker of the visible piece notes that a few pinecones, some greenery, and berries are enough, which is true if your yard or a walk supplies them.
These shed. A porch tree or an outdoor wreath handles the needle drop better than indoor carpet.
Materials Needed
Most of these projects start with what you probably have: felt, ribbon, paper, and whatever the yard or kitchen offers. For the clay entries, air-dry clay saves firing; a rolling pin and cookie cutters handle shaping.
Mod Podge appears twice, once for decoupage and once for sealing wood slices; matte medium works for the latter if that is what you own.
Hot glue is the fast joiner for clothespins, pinecones, and pom-pom trees; tweezers help place small beads and caps.
Sandpaper at 220 grit smooths clay after drying. Old sheet music, maps, and book pages all work for decoupage and layering; glitter shows up in some versions but nothing here depends on it.
Safety Tips for Crafting
Hot glue guns appear in at least 4 entries: clothespin snowflakes, pinecone gnomes, pom-pom trees, and photo ornaments. I keep a small bowl of ice water within reach; a dipped finger stops the burn faster than waving it.
Sharp tools mean the drill for wood slices, scissors for fabric and paper, and the craft knife implied by any clean cardboard cut. No entry requires a knife in a child’s hand, and none should.
Personalization Ideas
The photo ornaments entry already covers the family timeline approach; what the list does not mention is embroidery.
A photo transferred to cloth and set in a small hoop gives a softer edge than glass, and the hoop itself becomes the frame.
Vinyl letters from any craft store scrapbooking aisle handle the names on glitter ornaments; no cutting machine required.
Dates pressed into salt dough before baking, or written on the back of a wood slice in fine marker, turn a generic shape into a year marker.
The date goes on the back, the front stays clean; the tree reads as decoration, the box as archive.
Using Recycled Materials
Yarn balls work from one project’s leftovers.
The list does not mention wine corks, though they are common in this category; what it does specify is natural material already present. Pinecones come from the yard, wood slices from fallen branches, cinnamon sticks from the kitchen.
Applesauce in the dough is the leftover kind children will not finish, not a fresh jar. The practical point is starting with what is already in the house before buying for color match.
A tree built from scraps carries the slight mismatches of real use; the uniformity of purchased sets is what these projects step away from.
Frequently Asked Questions
What are some easy DIY ornament ideas?
Salt dough, clothespin snowflakes, and pom-pom trees all come together with household supplies and no special tools. Paper stars fold from printer paper or wrapping scraps without glue, so a mistake costs nothing.
Cinnamon and applesauce dough presses into cookie-cutter shapes and dries on a rack. The clothespin snowflake pulls apart into halves glued flat-side-in, with a button or bead from the junk drawer for the center.
How to make old fashioned ornaments?
Cinnamon and applesauce ornaments carry the oldest handmade smell, pressed into shapes and dried for a day or two. Quilted stars in reproduction feedsack or calico read as heirloom even from clearance fabric.
Mercury glass gets its age from a simple two-step attack: a base coat of mirror spray, then a flick of vinegar water to bite random spots through the finish before it fully sets.
Wood slices with bark still on frame folk-style painting like a rough mat. These all predate the glossy plastic era by decades or centuries.